The post gameday snacks: pepperoni pizza biscuit bites [week 6] appeared first on whisk and heels.
]]>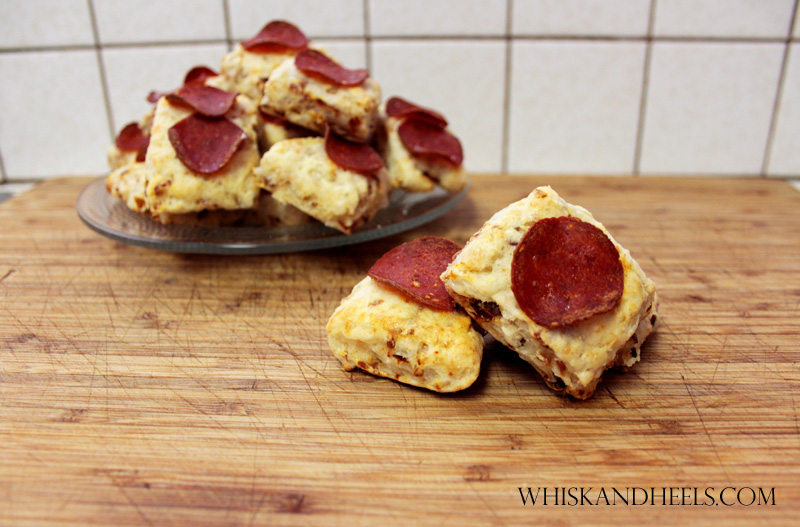
Pepperoni Pizza Biscuit Bites
The mozzarella MUST be freshly grated, or it won’t melt into the biscuit when baked. I also recommend investing in some good sun-dried tomatoes. I used a generic brand and found that the tomatoes were totally lacking in texture and flavor; I definitely would have benefitted from spending an extra few bucks on a better jar. If you have fresh tomatoes and an extra hour, you could slice them in half and oven roast them until they give up all their moisture. Just dice them up and use in place of the sun-dried tomatoes in the recipe.
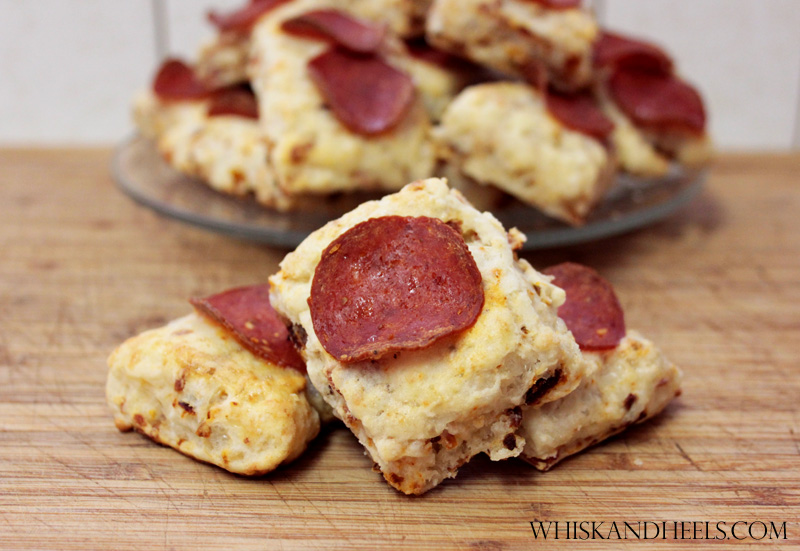
Pepperoni Pizza Biscuit Bites
I used regular pepperoni for this, but you could easily use a turkey or vegetarian version instead. I know that crisping the pepperoni seems like an unnecessary additional step, but you really need to do this in order to render out some of the excess fat and get the pepperoni slightly browned so that the texture is more similar to what you’d get on a fresh slice. The egg wash on top is really just to adhere the pepperoni slice to the top of the biscuit; you could add some additional mozzarella between the egg wash and the pepperoni if you want an extra punch of cheese.
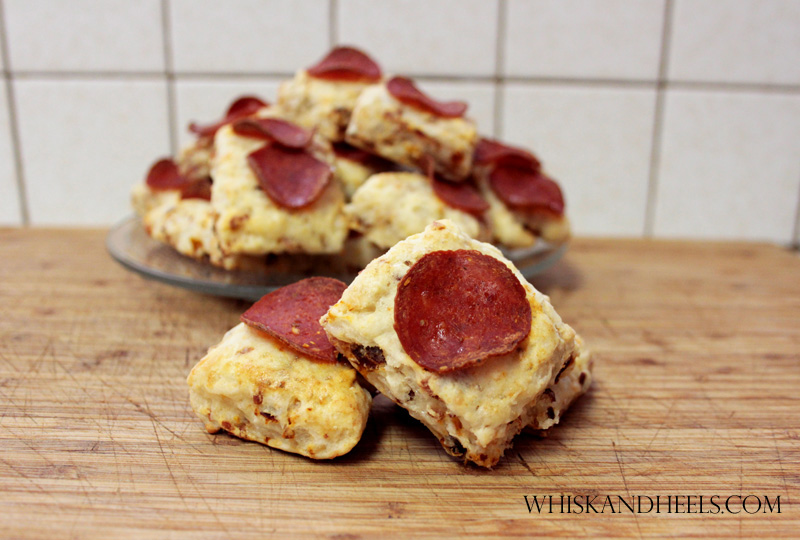
Pepperoni Pizza Biscuit Bites
I liked these pizza biscuit bites on their own, but my taste testers loved them sprinkled with grated parmesan and dunked in warm marinara. The choice is yours! Get creative with your pizza mix-ins and dipping sauces, and let me know what you come up with!
ingredients
- 2 C All purpose flour (plus more for flouring the board)
- 4 tsp Baking powder (1 TBSP + 1 tsp)
- 1/2 tsp Table Salt
- 1/4 tsp Baking soda
- 2 TBSP Unsalted butter, chilled and cut into 1/2 inch cubes
- 2 TBSP Vegetable shortening, cut into 1/2 inch cubes
- 1 C Buttermilk
- 1/2 C Diced Pepperoni
- 1/2 C Diced sun dried tomatoes, drained and blotted of excess oil
- 1 C Mozzarella, freshly grated
- 1 Egg, lightly beaten
- 36-50 Slices of pepperoni for topping
instructions
- Mise en place, and read this recipe all the way through.
- In a dry, nonstick skillet over medium heat, render 1/2 C diced pepperoni until crisp, about 5 minutes.
- Transfer to a paper-towel lined plate to drain and let cool.
- Combine flour, salt, baking powder, and baking soda in a large bowl and whisk to mix completely.
- Add diced butter and shortening to flour mixture and toss to coat. Use fingertips to smear the fat into the flour until the mixture resembles wet sand. Try to do this as quickly as possible so that the fat doesn't melt.
- Add mozzarella and drained and diced sun-dried tomatoes to the flour mixture and toss to coat.
- Add crisped pepperoni and toss to coat.
- Make a well in the center of the bowl and pour in buttermilk. Use fingertips to work the buttermilk into the flour until just combined. The dough may still be slightly crumbly and not one solid mass - just let it be. You do not want to over-work the dough.
- Turn the dough out onto a well-floured board and dust the top with more flour. Fold the dough over itself a few times to gently knead.
- Make sure the board is still well-floured, then pat dough out into a half-inch thick square.
- Cut into 36 pieces by making 5 vertical cuts and 5 horizontal cuts.
- Transfer to a lightly greased baking sheet leaving about a half inch between each biscuit. Brush the top of each biscuit with the beaten egg, then put a pepperoni slice on top.
- Put on the top rack of a 450 degree oven and bake for 10 minutes.
- Remove and let cool 5-10 minutes. Serve warm or at room temperature.
Notes
Recipe adapted from Alton Brown
Optional: Dust with grated parmesan cheese and serve with warm marinara.
The post gameday snacks: pepperoni pizza biscuit bites [week 6] appeared first on whisk and heels.
]]>The post perfect buttermilk cupcakes appeared first on whisk and heels.
]]>
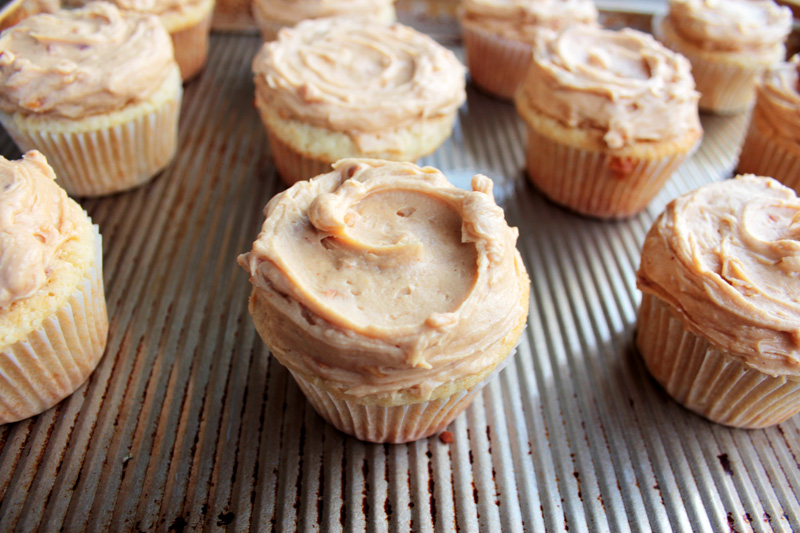
Buttermilk Cupcakes with Chunky Peanut Butter Frosting
“Hi there! I’m a super light and flavorful buttermilk cupcake, and I’ve been completely slathered in a rich, creamy, chunky peanut butter frosting just for YOU!” said one dozen cupcakes, to my mouth. And then they were gone.
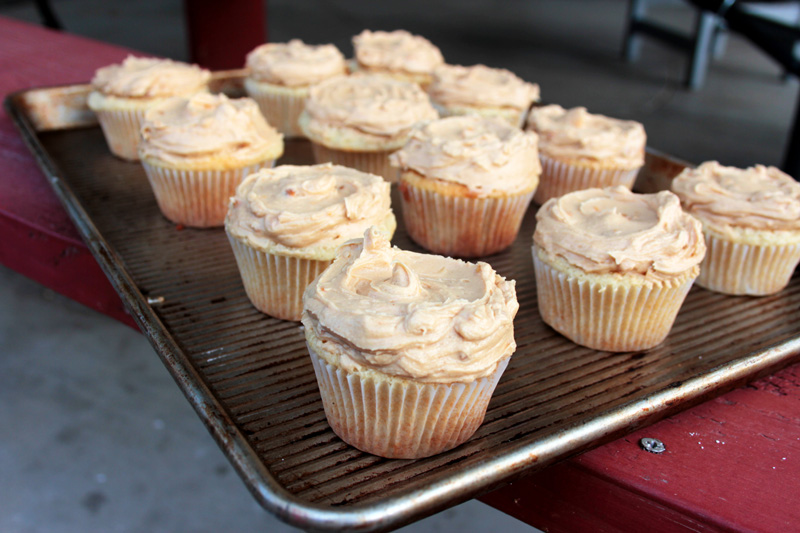
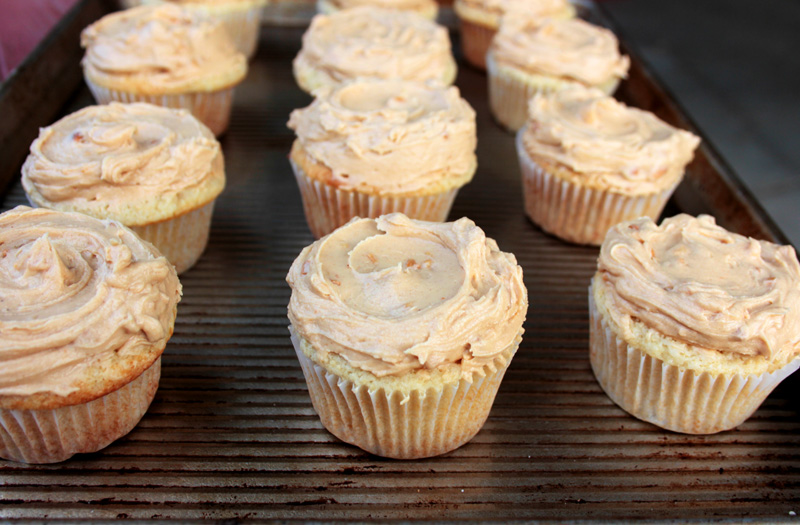
Buttermilk Cupcakes with Chunky Peanut Butter Frosting
I really wasn’t kidding when I said I’ve been working on a buttermilk cupcake recipe for a long time. I started with this recipe a few years ago, and have been tweaking it slightly to fit a variety of flavor profiles. I’ve infused it with mint for mojito cupcakes, peach for my peaches and dream cupcakes, and lemon for margarita cupcakes – all by steeping different ingredients in the milk the recipe called for or by adjusting the extract. I love to keep a great basic recipe in my back pocket and tweak it ever so slightly to create totally different flavors, but over time, I found myself wanting for a softer crumb and more moisture than my go-to could give me. I turned to buttermilk – one of my favorite ingredients – and quickly realized that I needed to adjust my leavener. As you can see in the photo below, my cupcakes rose faster than the structure could form, which resulted in super spread-out cupcakes.
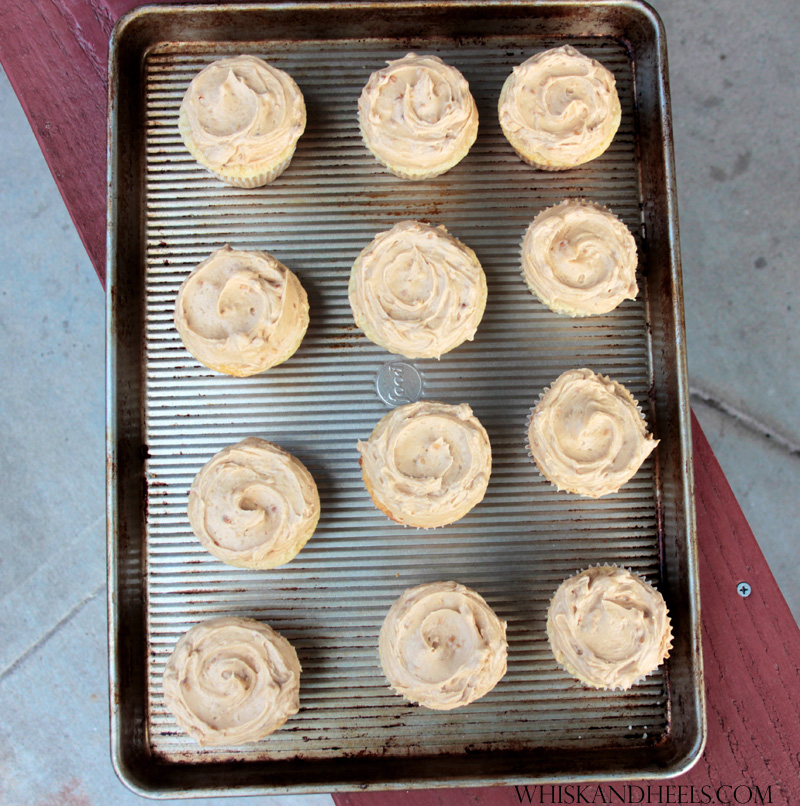
After a few more trials, I finally got the beauties captured in this post. I’m so happy to finally be able to share this recipe – as Rachel Zoe would say, it’s so maj. I hope you enjoy it!
Buttermilk Cupcakes with Chunky Peanut Butter Frosting
ingredients
- 1 1/4 C + 2 TBSP All purpose flour
- 1/2 tsp Baking soda
- 1/4 tsp Table salt
- 1/2 C Unsalted butter, at room temperature
- 1 C Granulated sugar
- 1 Egg, at room temperature
- 1 tsp Pure vanilla extract
- 1/2 C Buttermilk, at room temperature
instructions
- Mise en place, and read this recipe all the way through.
- Whisk together flour, baking soda, and salt in a large bowl. Set aside.
- Cream butter and sugar together over medium speed until light and fluffy.
- Add the egg, and beat until thoroughly integrated into the butter and sugar mixture.
- Add vanilla extract, and beat until combined.
- With the mixer or beaters on low, add one third of the flour mixture to the butter mixture. Beat until there are only a few streaks of flour left, then add half of the buttermilk. Beat until just combined.
- Add another one third of the flour, followed by the buttermilk, and finish with the final flour installment - each time, beating until just barely combined.
- Portion evenly into a standard 12-well muffin tin lined with paper liners, and insert into a 350 degree oven.
- Bake 16-20 minutes, or until the tops of the cupcakes spring back when gently pressed.
- Let cool in the tin for 5 minutes, then remove and let cupcakes cool completely over a wire rack.
- Once completely cool, frost. I recommend this chunky peanut butter frosting
The post perfect buttermilk cupcakes appeared first on whisk and heels.
]]>The post chunky peanut butter frosting appeared first on whisk and heels.
]]>
Buttermilk Cupcakes with Chunky Peanut Butter Frosting
I have to confess – there was a brief period in my life where I may have subsisted almost entirely on peanut butter spread over apples or toast (no, I don’t do peanut butter and celery. Celery goes with ranch dip.). It’s taken me some time, but I’ve finally realized that peanut butter can actually be consumed for enjoyment, and not just for convenience. I piled this crunchy, creamy, deliciousness on top of these buttermilk cupcakes, but I’m plotting round two with a dark chocolate layer cake.

Buttermilk Cupcakes with Chunky Peanut Butter Frosting
ingredients
- 1/2 C unsalted butter, at room temperature
- 1 C chunky peanut butter
- 2 C powdered sugar
- 1/4 C whole milk
instructions
- Mise en place, and read the recipe all the way through.
- Combine room temperature butter and peanut butter in a large bowl, or the bowl of a stand mixer. Beat on medium speed until fully combined.
- With mixer or beaters on low, add the powdered sugar 1/2 c at a time, allowing the sugar to mix in completely before adding the next 1/2 cup. Adding in small doses over a low speed will prevent the powdered sugar mushroom cloud that can sometimes happen while making frosting.
- Add 1/4 C whole milk to the mixture and beat to combine.
- Spoon or pipe over cooled cupcakes.
The post chunky peanut butter frosting appeared first on whisk and heels.
]]>The post gameday snacks: simplified arancini [week 5] appeared first on whisk and heels.
]]>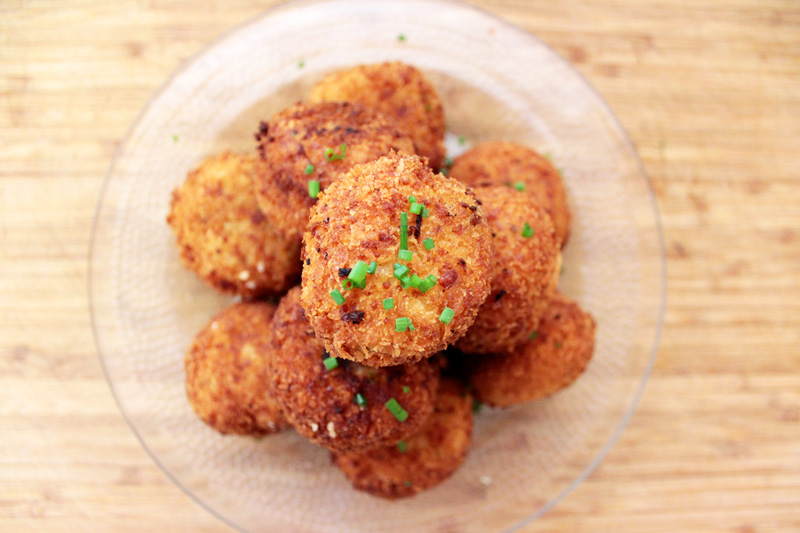
Arancini
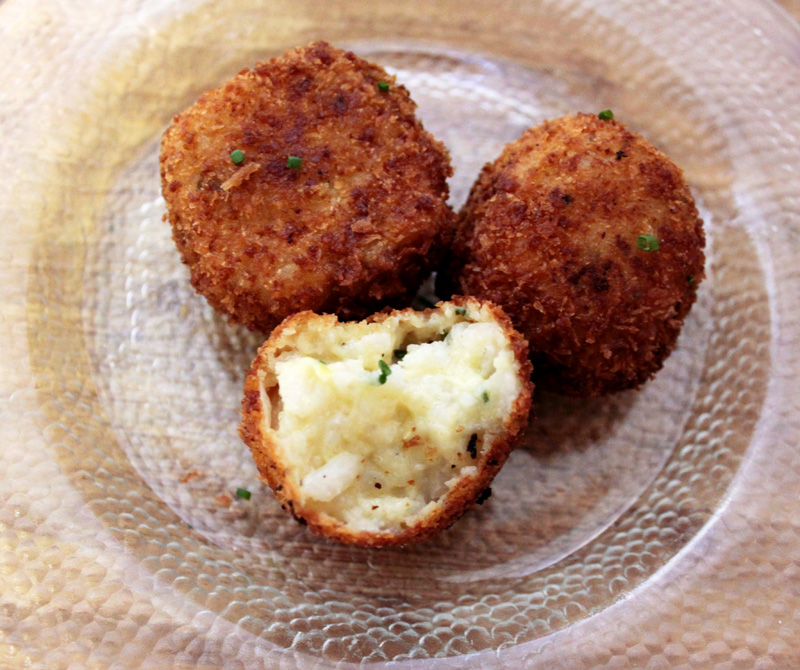
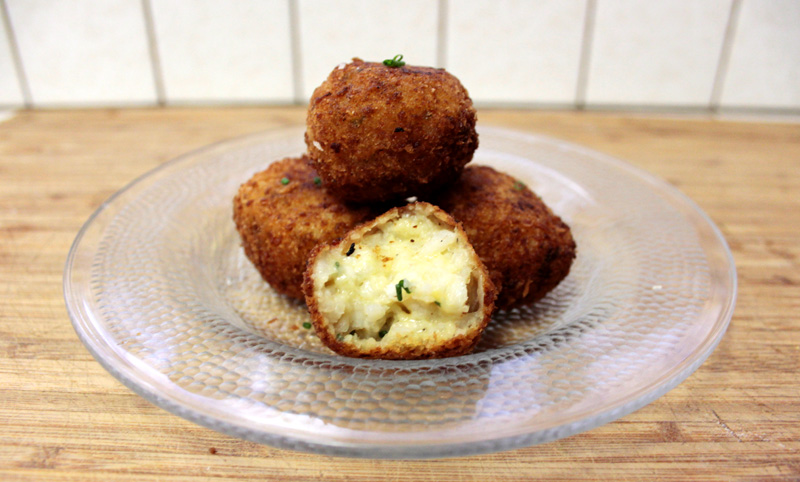
Many years later, I’ve finally concocted my own go-to risotto AND a favorite use-up. To be fair, this isn’t a traditional arancini. If you’re Italian and you’re reading this, please don’t hate me. I’m not trying to disrespect you – I’m just really lazy and I don’t feel like trying to get tiny chunks of cheese perfectly centered inside of day-old risotto. I’d rather load up said risotto with some extra cheese to keep the flavor intact and call it a day.
Arancini
Seriously, I see nothing wrong with that picture. But if you like, go ahead and stuff whatever you want in the center – though be advised that mozzarella is the traditional choice. I considered a melty Point Reyes Toma but ate it with some bread instead. Oops.
Arancini
I’m sure you noticed the difference in the color of the crust between the arancini tower photos and the close ups. I promise it’s not photoshopping! I was experimenting with size to see wether a large or small arancini would vary in how well they held together after the first bite. I cooked the larger ones a little longer than the smaller ones to make sure that they warmed all the way through, and the crust got a little darker. Not surprisingly, the smaller arancini were easier to eat with one hand because they held together better.

Arancini
Aside from just generally being awesome, arancini is another really versatile dish. You can adjust the flavors of your risotto to compliment any meat accompaniment, and you can even shred up leftover meat into the risotto the next day to add some extra protein to your arancini indulgence. I used the lemon-herb risotto I made for this dish – if I’d had any leftover salmon, I would absolutely have added it to my arancini! Another great tip: double the recipe and eat half for dinner the night before (can be made up to 5 days in advance). On gameday, you can even assemble and fry an hour before kickoff and keep warm in a 200 degree oven.
ingredients
- 1 C minced shallot (2 large shallots)
- 1 TBSP minced garlic (3 medium cloves)
- 1 TBSP olive oil
- 2 TBSP butter, divided
- 3/4 C arborio rice
- 3 1/4 C vegetable or chicken stock
- 1/2 tsp lemon zest
- 1 TBSP lemon juice
- 1/2 C freshly shredded parmesan cheese
- 2 TBSP chopped chives
- 1 TBSP chopped basil
- Salt and pepper to taste
- 1 1/2 C panko breadcrumbs
- 1/2 C grated parmesan
- 1 C all purpose flour
- 1 egg, lightly beaten with 2 TBSP water
- 2 C canola oil (or other flavorless frying oil)
instructions
- Mise en place, and read this recipe all the way through
- Heat stock to a simmer in a large pot. Keep the lid on, and keep the stock warm throughout the process.
- In a large, heavy bottomed pan, heat 1 TBSP oil and 1 TBSP butter over medium low heat.
- Add shallots and sweat 5-10 minutes, until translucent. If the shallots start to brown, you need to reduce your flame.
- Add garlic and cook another 30-60 seconds, until garlic is fragrant.
- Add arborio rice and stir to coat completely in the fat. Cook until the edges of the arborio start to turn translucent. This will take 3-5 minutes.
- Add a ladle of warm stock to the pot, and stir with a wooden spoon until the liquid is absorbed. This will happen very quickly for the first few additions.
- Continue adding a ladle of warm stock at a time and stir as the rice absorbs the liquid until all of the stock has been added to the rice.
- Remove from the heat and add 1 TBSP butter, the parmesan, herbs, lemon zest, and lemon juice. Add salt and pepper to taste - but do so after adding the cheese, which contains lots of salt.
- Store in an airtight container and refrigerate overnight (can be made five days in advance).
- Combine panko and parmesan in a shallow dish or plate and mix together.
- Remove 1/4 C of the mixture and add to the cold risotto, stirring to combine completely.
- Portion out 1 TBSP portions of risotto and roll into balls.
- Add 1 inch of oil to a dutch oven or other heavy-bottomed, high-sided pan. Set over medium heat for 10-15 minutes, or until oil reaches 375 degrees.
- While the oil is heating, prepare the arancini for frying. Set up a breading station, with the flour in one shallow dish, then the egg and water in another, and finally, the panko and parmesan mixture at the end.
- Dredge each risotto ball in flour, then egg, then panko. Repeat until all are breaded.
- Use a spider to drop 4-5 of the breaded risotto into the hot oil. This is a shallow-fry, so you'll need to flip everything once the first side is browned.
- Once the arancini are evenly browned, remove from the hot oil - carefully! - and transfer to a foil-lined baking sheet.
- Keep cooked arancini warm in a 200 degree oven as soon as they come out of the fryer and continue to fry until all are complete.
- Keep warm for up to an hour. I like to serve these with a few lemon wedges to brighten up the flavor profile after the fry.
Notes
Making the risotto will take about an hour from prep to completion. Assembling and frying the arancini will only take 20 minutes.
You need to shred and grate your own parmesan to get the best flavor and texture - buying it prepared will yield a chalky texture and far less parmesan flavor.
As always, I encourage you to get creative with this dish! Pick leftovers to use up and try to adjust the aromatics in the risotto to complement them. Tell me what you come up with in the comments below!
The post gameday snacks: simplified arancini [week 5] appeared first on whisk and heels.
]]>The post carrot and goat cheese tart appeared first on whisk and heels.
]]>
Carrot and Goat Cheese Tart
I know what you’re thinking. ”STOP WITH THE TARTS ALREADY!!! PASTRY FREAKS ME OUT!!!” Sorry. I can’t help it. I have been utterly obsessed with finding unique ways to put my dinner in a pastry crust, and this carrot and goat cheese tart is one of the few that I managed to photograph before devouring. If you read the title and came only for the photos (and my cunning wit, of course) because you’re goat cheese averse… I get it. I used to be just like you! I thought goat cheese was gross: I avoided it like the plague. My boyfriend forced me to give it another chance (I think he probably snuck it into a salad somewhere down the line) and I found myself enjoying the creamy texture and tang. That said, I know there’s quite a variety of goat cheese out there, and some of them are still too-goaty for me. I like to go for a fresh chevre; a firmer one will crumble into a salad beautifully while a softer one is great as a spread – and especially in this carrot and goat cheese tart recipe!
Carrot and Goat Cheese Tart
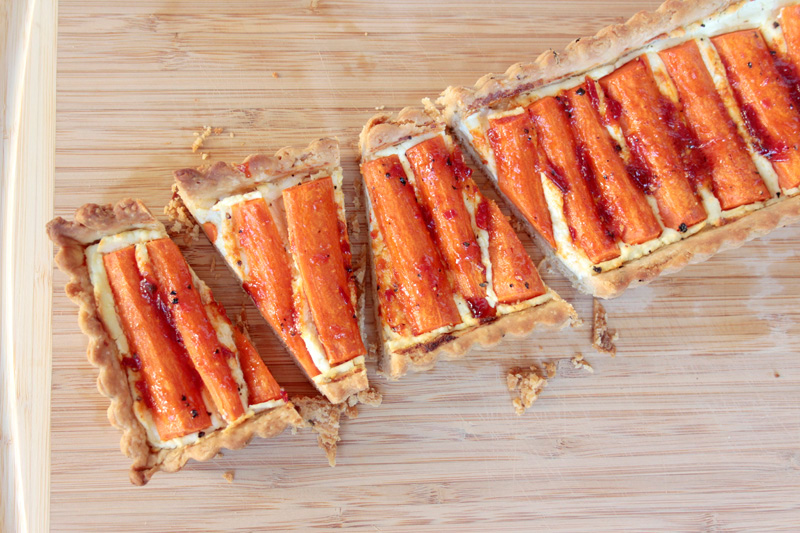
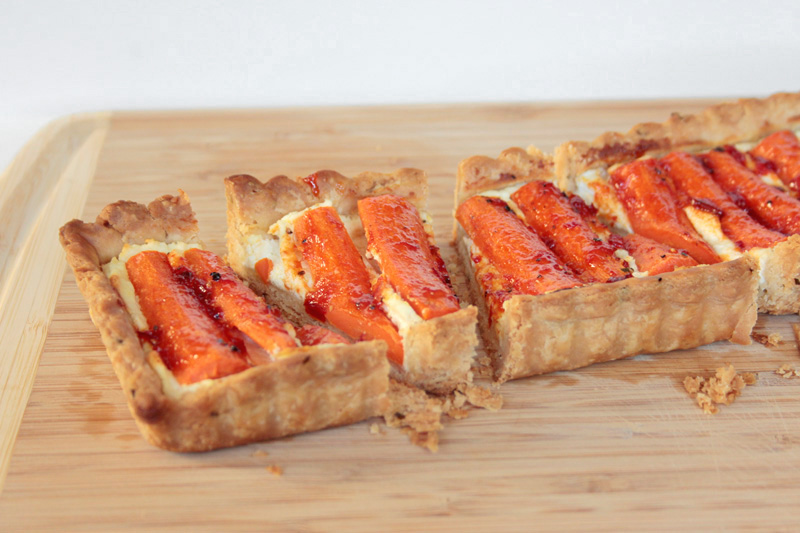
I was fairly meticulous in my prep work and arrangement of the carrots within the tart because I wanted it to look exactly as I envisioned. To achieve the look above, I measured the distance across the tart shell and shaved of a few millimeters for the border. I sliced one carrot to the exact measurement, and used it as a guide for the others. I also sliced all of my carrots to the correct length, THEN started slicing them in half or in quarters. If your carrots range in diameter – as most carrots do – you’ll probably have to slice some segments in half and others in quarters. Just make sure you don’t have any carrots that measure more than half an inch thick, and your tart should come out fine.
Carrot and Goat Cheese Tart
Not a fan of spice? You could absolutely skip the chutney and go for an apricot jam topping instead. Just finish it with some fresh herbs to cut the sweetness a bit.

Carrot and Goat Cheese Tart With Arugula Salad
To make this a complete meal, I tossed some arugula in my finest olive oil and a few squeezes of lemon. I finished the salad with salt, pepper, and some lemon zest. The combination was fresh and filling, but also fairly light – surprising, right?
ingredients
- 2 C all purpose flour
- 6 TBSP cold unsalted butter, cut into 1/2 inch cubes
- 5 TBSP vegetable shortening, chilled and cut into 1/2 inch cubes
- 1 large egg, lightly beaten
- 2 TBSP minced chives
- 1 tsp table salt
- 4 large carrots
- 6 oz spreadable goat cheese, at room temperature
- 2 TBSP jalapeno chutney
instructions
- Mise an place, and read this recipe all the way through
- Combine salt, flour, and chives in a large bowl and whisk together
- Add chilled butter and shortening, and toss to coat in the flour.
- Transfer to the bowl of your food processor, if you choose, or proceed to cut by hand using a pastry blender.
- Pulse or cut until the butter is the size of peas, then add the beaten egg and continue to pulse or cut until just combined. The mixture should be crumbly but hold together when squeezed.
- Transfer the crumbs to a rectangular tart pan with removable bottom, and gently press together along the base and sides to form the pastry.
- Chill in the refrigerator for 1 hour, then remove and dock the bottom of the pastry with a fork 15-20 times.
- Blind bake (put parchment paper on top of the pastry and weight down with beans or pie weights) in a 425 degree oven for 15 minutes, then remove the parchment and weights (CAREFULLY) and bake, uncovered, for another 10 minutes.
- Remove from oven and let cool completely.
- Spread 6 oz room temperature goat cheese inside the pastry.
- Cut carrots to the correct length for your tart pan, then quarter or halve the segments so that no piece has a width greater than half an inch.
- Assemble the carrots as desired and press gently to ensure that the carrots are surrounded by goat cheese.
- Brush the tart with canola oil and sprinkle with salt and pepper.
- Bake at 425 for 20-25 minutes on the top rack of the oven until carrots are tender.
- Heat chutney in the microwave for 30 seconds to loosen it, then brush over the warm tart.
- Allow the tart to cool on a wire rack until the tart pan is cool enough to handle, then remove the tart from the pan, slice, and serve.
The post carrot and goat cheese tart appeared first on whisk and heels.
]]>The post gameday snacks: clucks in a biscuit [week 4] appeared first on whisk and heels.
]]>
Clucks in a Biscuit
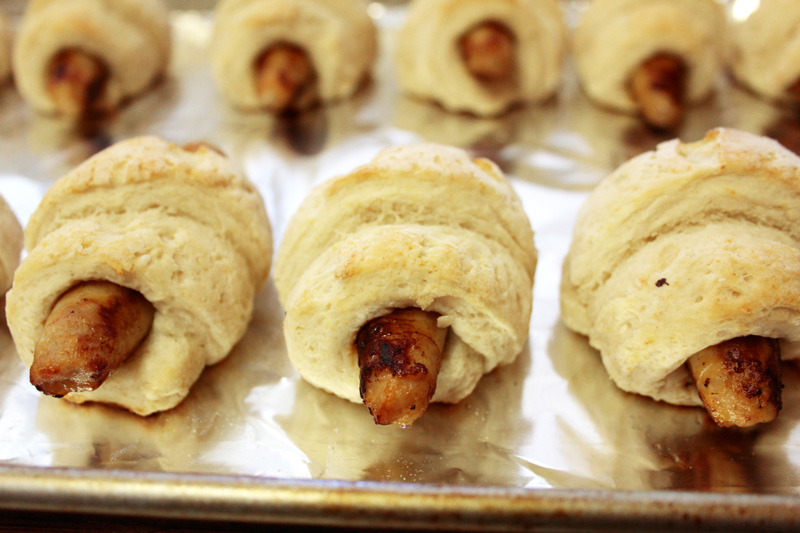
I am brimming with excitement over this post. I was so grumpy this morning because I felt totally uninspired by everything on my gameday snack brainstorm list. I was scouring the internet for ideas and inspiration (i.e. skimming Pinterest and foodgawker) and somewhere down the line, a photo of pigs in a blanket popped up. I’m really not a fan of hot dogs or pre-made doughs, so my gut reaction was “gross.” Cue inspiration: I realized I didn’t have to use either to made a variation of pigs in a blanket that I would enjoy! I decided to swap the hot dogs for my favorite chicken breakfast sausages, and use homemade buttermilk biscuit dough in place of the traditional crescent dough. Of course, it only seemed natural to top my little clucks in a biscuit (because it’s chicken sausage wrapped in biscuit dough, get it?) with some homemade honey mustard. I’m embarrassed to admit that I ate 3 of these after I finished photographing them.
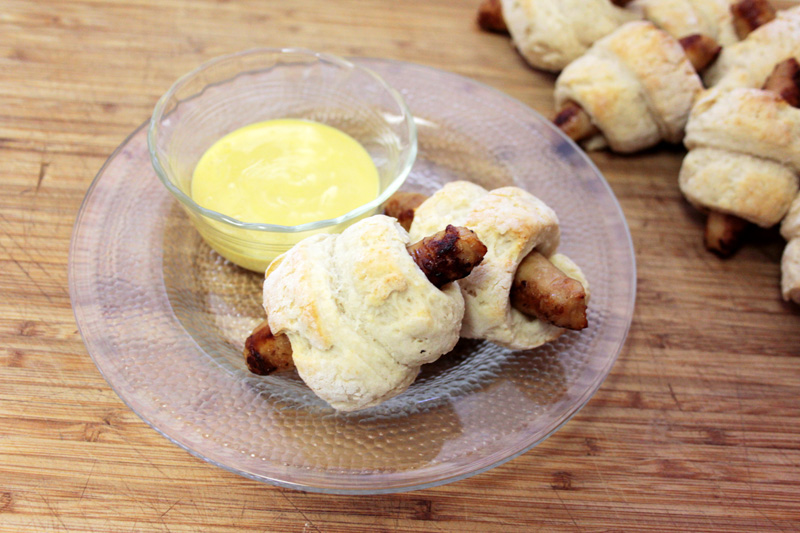
Clucks in a Biscuit with Honey Mustard Dipping Sauce
You can really use any breakfast sausage, biscuit dough, and dipping sauce you’d like for this riff on pigs in a blanket. I was toying with the idea of serving these with both a mustard and a cheese sauce, but I had just devoured some brie and crackers and didn’t really feel like eating any more cheese. Another great variation would be a traditional pork sausage with hollandaise, or a vegetarian sausage with sriracha mayo. The possibilities are endless, so I encourage you to play with the flavor profiles YOU enjoy – and please tell me what you come up with!

Clucks in a Biscuit with Honey Mustard Drizzle
ingredients
- 12 breakfast sausages (I like chicken)
- 1 recipe biscuit dough
- 1/3 C honey mustard (for dipping/drizzling)
instructions
- Place a nonstick pan over medium heat and add breakfast sausages and cook on all (4!) sides until golden brown and delicious, and cooked through. If your nonstick pan isn't so nonstick, give it a light spritz of cooking spray to prevent sticking.
- Once cooked, transfer sausages to a plate and let cool 10 minutes on counter, then transfer to the refrigerator and chill through. This will take a minimum of 30 minutes, but can be done the night before (just transfer to a tupperware or resealable bag instead of the plate).
- Once the dough is mixed and folded over itself a few times, we deviate from Alton's instructions.
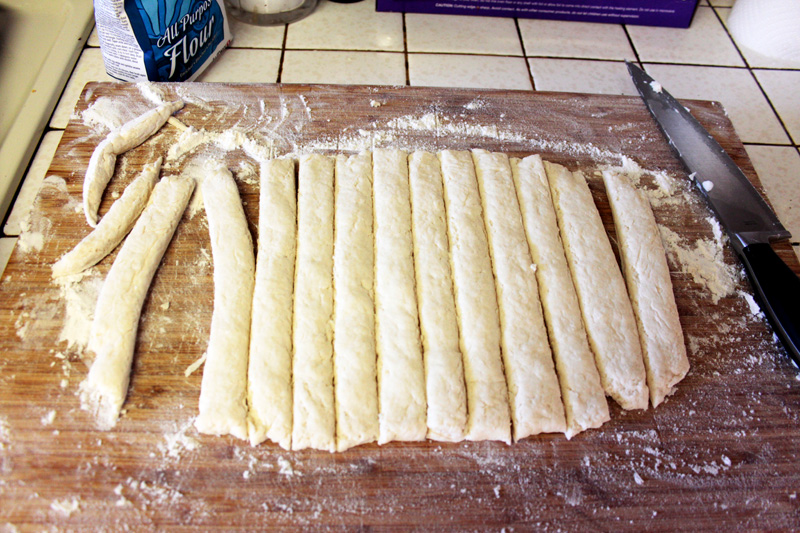
- On a very well-floured board, pat the dough into a half-inch thick rectangle, measuring approximately 12 x 8 inches.
- [Image below] Use a pizza wheel, if you have one, to cut the dough in half, in half again, and then into thirds. Basically, you're quartering your dough and then cutting it into thirds to yield 12 1x8 inch strips of dough. If you don't have a pizza wheel, use a chef's knife but DO NOT drag it through the dough. Press it through, then move to the end of the cut, and press it through again to complete the cut. If you've worked with puff pastry before, this should be a familiar technique to you.
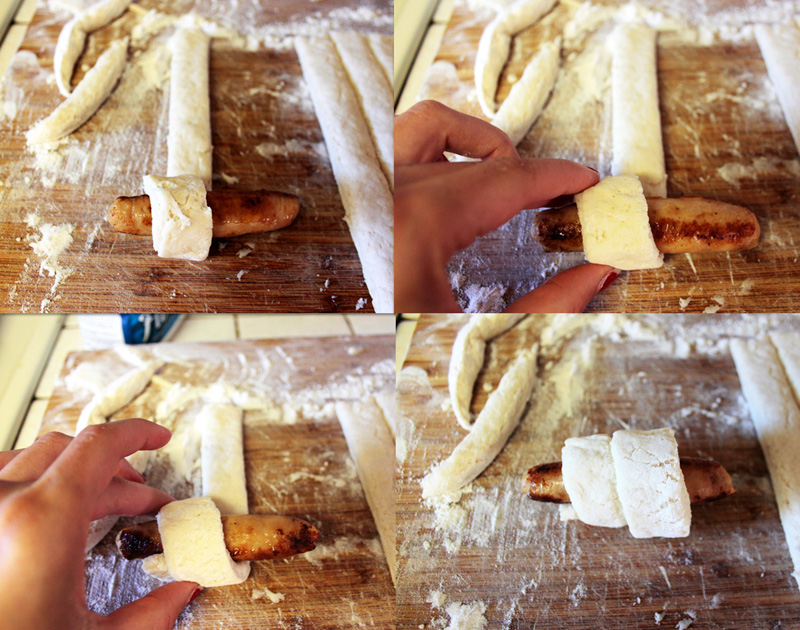
- [Image below] Time to roll! Grab a chilled sausage and rest it on top of a biscuit strip, about one inch from the bottom of the strip. I like to leave about a half inch of the sausage exposed, but if you want 100% biscuit coverage, just start at the edge of the sausage. Fold the biscuit dough over the sausage, then, using one hand to hold the end of the sausage and the other hand to guide the dough, roll the sausage up the dough until you reach the top. Be sure to overlap the dough slightly as you roll it up. (The only reason you don't see me using two hands is because one was operating my camera)
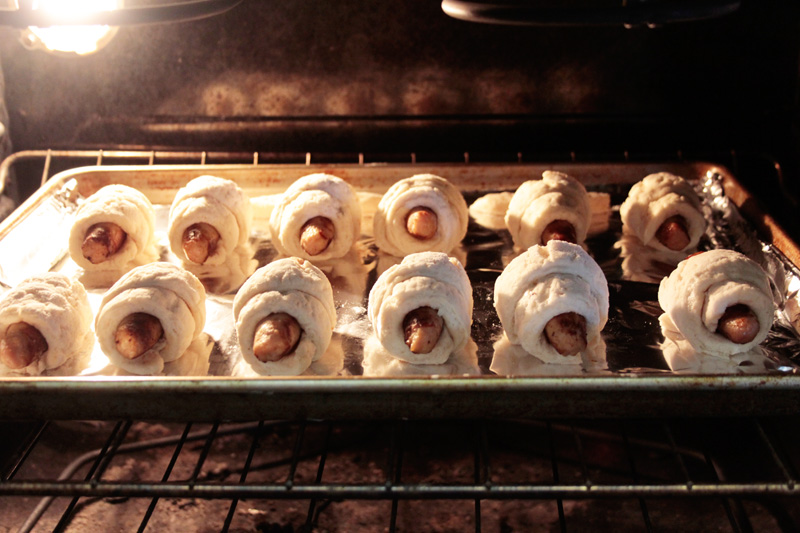
- Arrange the clucks in a biscuit on a foil-lined baking sheet and bake at 450 for 12-18 minutes (mine took 15)
- Let them cool on the baking sheet for 10 minutes, then transfer to a serving dish.
- Either serve with honey mustard dipping sauce, or drizzle honey mustard over each before serving
Notes
If you don't chill your sausages down, you'll risk melting the fat in the biscuit dough and getting a less than delicious final product.
Happy eating!
The post gameday snacks: clucks in a biscuit [week 4] appeared first on whisk and heels.
]]>The post homemade honey mustard appeared first on whisk and heels.
]]>
ingredients
- 1/2 C mayonnaise
- 3/8 C yellow mustard (that's 1/4 C + 2 TBSP)
- 1/4 C honey
instructions
- Combine all ingredients in a large measuring cup and whisk until fully combined.
- Transfer to storage vessel and mark the earliest expiration date from the 3 ingredients clearly.
I like to use this honey mustard as a dip, a salad dressing, and a sandwich spread – it has a really versatile consistency so it works well in pretty much every application.
The post homemade honey mustard appeared first on whisk and heels.
]]>The post september birchbox review appeared first on whisk and heels.
]]>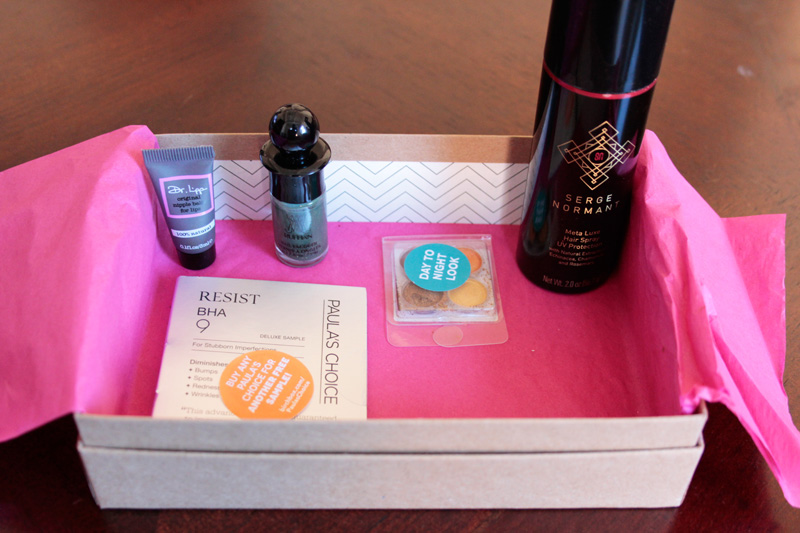
September Birchbox
So it’s the tail end of September and I’ve finally gotten around to sampling and reviewing all of the products I received in my September Birchbox. I got some great products this month! I was unfamiliar with Paula’s Choice and Coastal Scents – and you know I love discovering new brands! I was also really excited to try a new hairspray, especially Serge Normant’s, because I love his dry shampoo. This month I also wanted to try something different and include photos of how a product looked on me when I tried it in order to provide a better review. I hope this makes the reviews more useful to you!
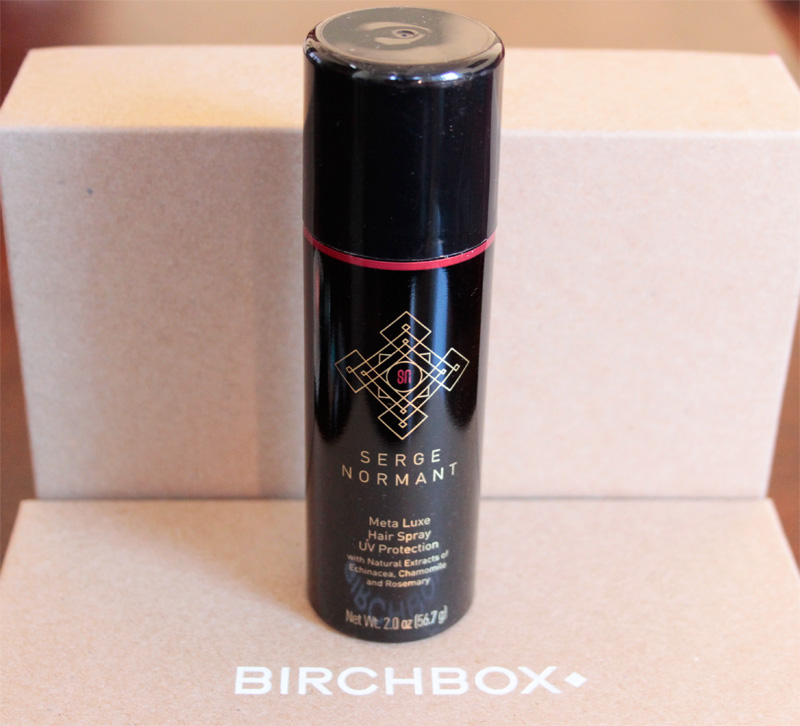
Birchbox – Serge Normant Meta Luxe Hairspray
Serge Normant Meta Luxe Hairspray: There’s two kinds of people in this world – those who use hairspray properly, and those who do not. Then, there’s hairspray like this that is almost impossible to use improperly. Part of my product test was to over-spritz my locks to see how the buildup would feel after, say, 2-3 styles. Drumroll please… there was literally no buildup. I used this in a variety of applications, from setting an updo to making my bedhead work-appropriate. I got great definition and a strong hold, but my hair remained touchable and impermeable by the San Francisco wind. Check out my photo below for the bedhead application – I used hair oil to smooth out some of the frizz and a few sprays of the Serge Normant, et voila!

September Birchbox – Ruffian Lacquer: Hedge Fund
Ruffian Nail Lacquer – Hedge Fund: This lacquer is amazing. The formula is thick and pigment rich, and the bottle design makes the brush very easy to control. I needed only 2 coats to create the look below, and the lacquer set very quickly. I painted my nails before bed and did not wake up with the dreaded sheet crinkle texture on my nails.
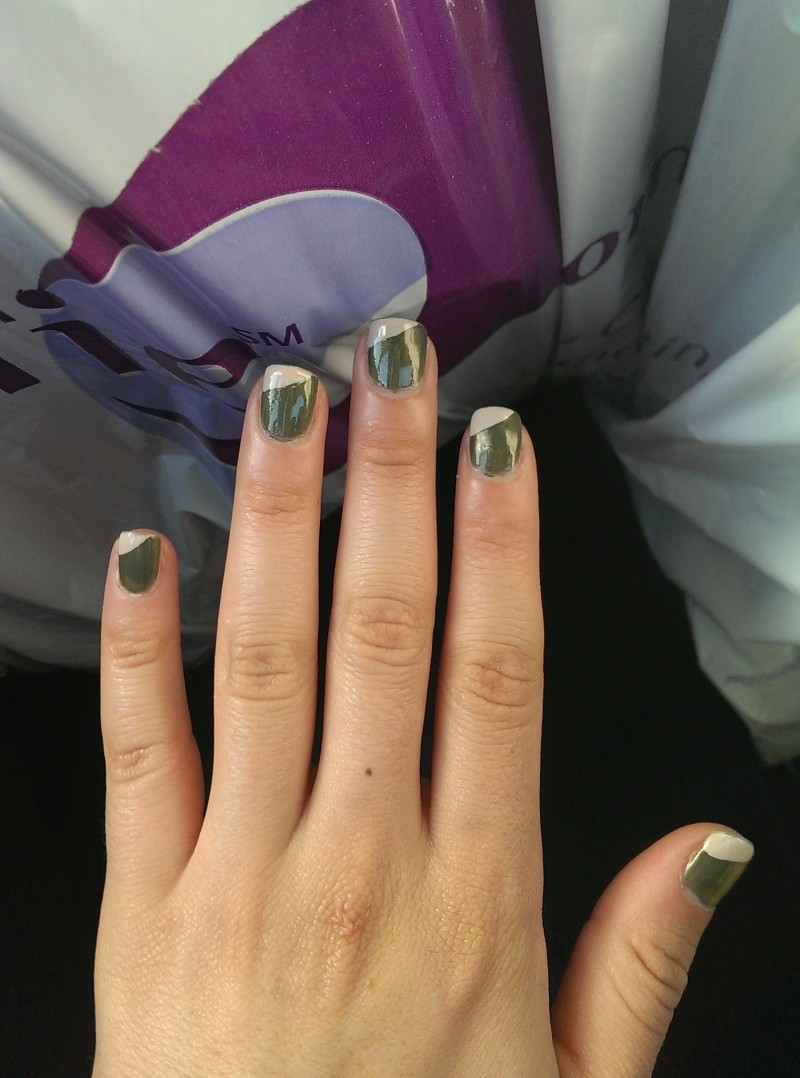
Hedge Fund Mani
My mani stayed intact for approximately one week with no chips, which is something of a miracle given how much I cook. Did you know that Ruffian is actually a fashion brand, and that this lacquer is their debut beauty release (available exclusively at Birchbox). These gents are also the geniuses behind the Ruffian Manicure – also known as the half-moon mani. Check out my tutorial over here to score a salon-status Ruffian Manicure at home.
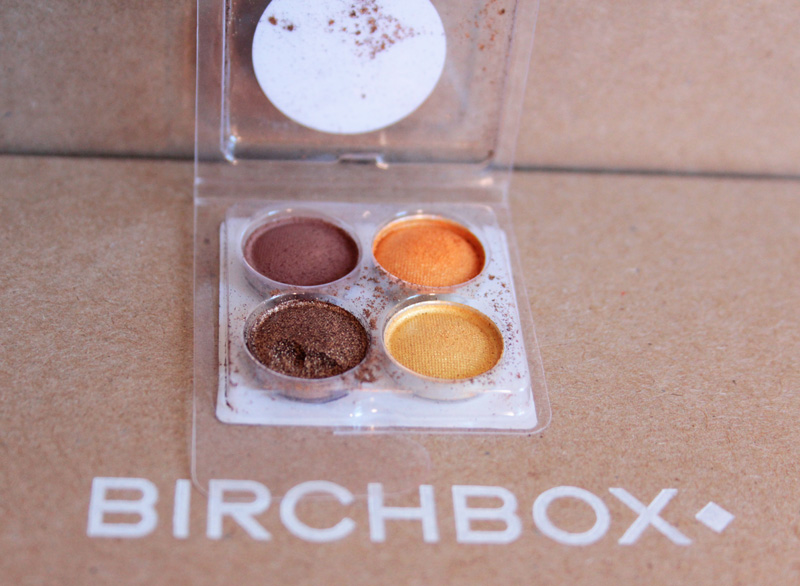
Coastal Scents Neutral Mirage Palette
Coastal Scents Neutral Mirage Palette: So I feel pretty bad admitting this, but I’m really skeptical of eyeshadows that come in giant palettes… especially from brands I’ve never heard of. My skepticism was totally shot down. The texture of the shadow was smooth, like what you would expect from your department-store shadows. The pigment was rich and the shadows all applied very well to my lids (it didn’t cling to one section of my lid and refuse to blend out). I created the below look using colors from my sample (and black liner and mascara). This look stayed in place until I removed it at the end of the night. While the palette is probably too big for my on-the-go lifestyle, this would be a great, affordable investment for someone who wants a ton of colors to play around with and who doesn’t live out of a suitcase/car.
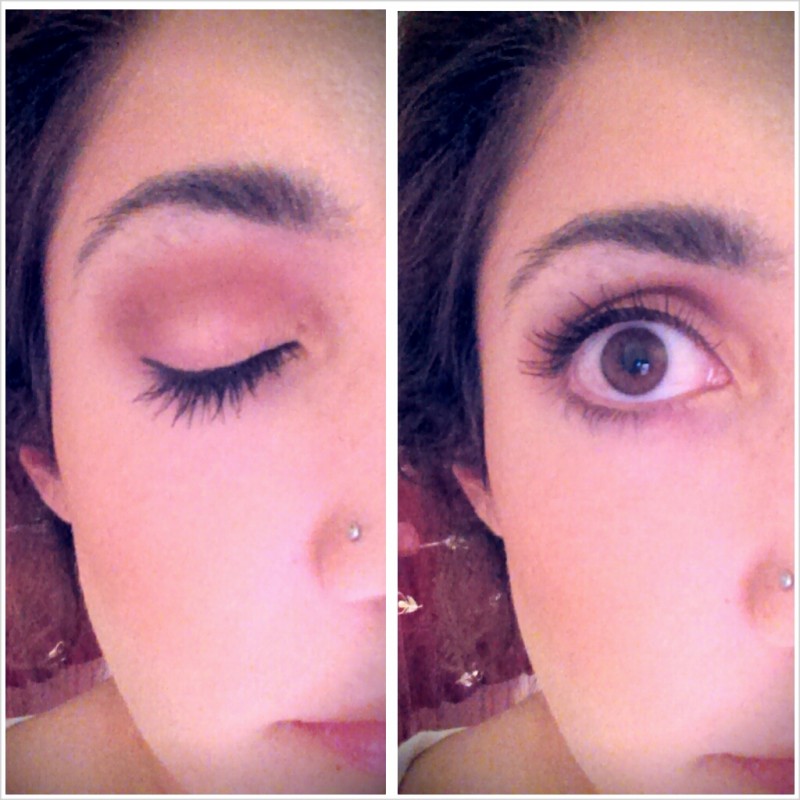
Coastal Scents Eyeshadow Look
The color is a little off (crappy lighting in my room), and you can go ahead and ignore my sloppy brows, please. I used the yellow gold on my inner corners, the orange over my lid, and layered the sparkly brown over the matte brown in my crease for some subtle drama.
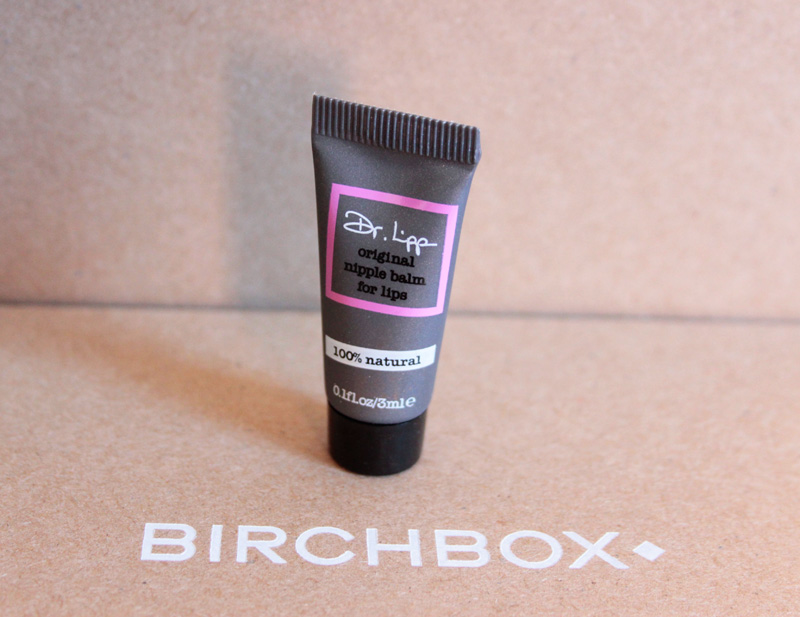
Dr. Lipp’s Original Nipple Balm for Lips
Dr. Lipp’s Original Nipple Balm For Lips: This sounds NSFW but it’s totally PG. Dr. Lipp originally created this product for nursing mothers to sooth any post-feeding discomfort, like chafing or dryness. The brand later discovered that this little balm worked miracles on lots of dry areas, including lips and cuticles. The formula has a texture and consistency more similar to Vaseline than lip balm or lotion, and you need the tiniest amount to cover your lips. It really did work a miracle on my moisture-starved lips. My only complaint is the ease of application. I had a hard time getting the product out of the tube, and found it a little too sticky for on-the-go application. I always has some excess residue on my finger and often didn’t have anywhere to wipe it.
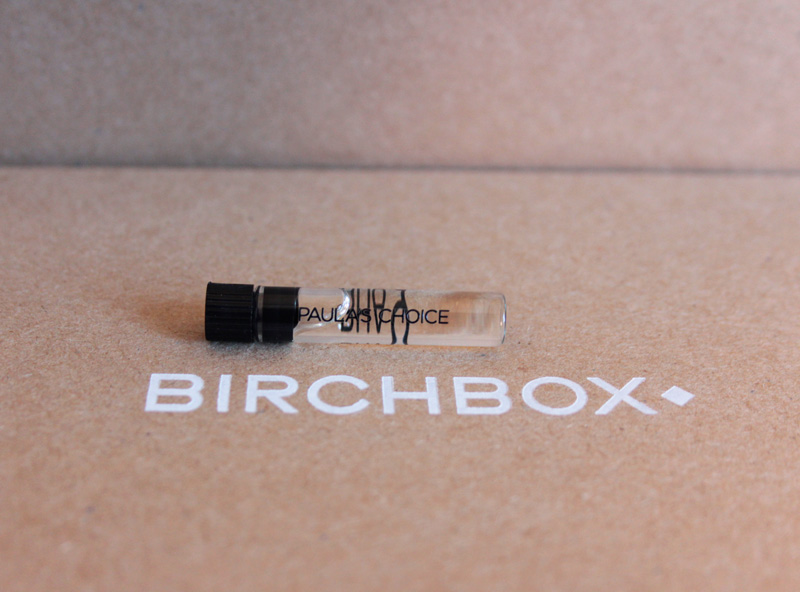
Paula’s Choice Resist BHA 9
Paula’s Choice RESIST BHA 9 for Stubborn Imperfections: Well, that’s a mouthful. To be honest, I had really high hopes for this product (it arrived during a terrible skin-week for me). I didn’t see much benefit from it. I applied the serum-like-stuff 3 nights in a row, exactly as instructed. Maybe my pores looked a little smaller, but my skin didn’t feel any smoother, and my blemishes certainly didn’t calm down. This wasn’t a good addition to my beauty regimen, but perhaps it could be to yours! If you do give it a try, I’d be curious to hear how it worked for you.
That’s all for this post! Until next month ![]()
The post september birchbox review appeared first on whisk and heels.
]]>The post ruffian manicure tutorial appeared first on whisk and heels.
]]>For this look, I used Essie’s Twin Sweater Set and Color Club’s Birchbox Exclusive Put a Pin in it. While this particular tutorial unfortunately does not feature a Ruffian lacquer (Birchbox only sent me one, okay!), you can check out my Hedge-Fund mani on my September Birchbox Review post to see how I used it.

Birchbloggers Ruffian Manicure Tutorial Step One
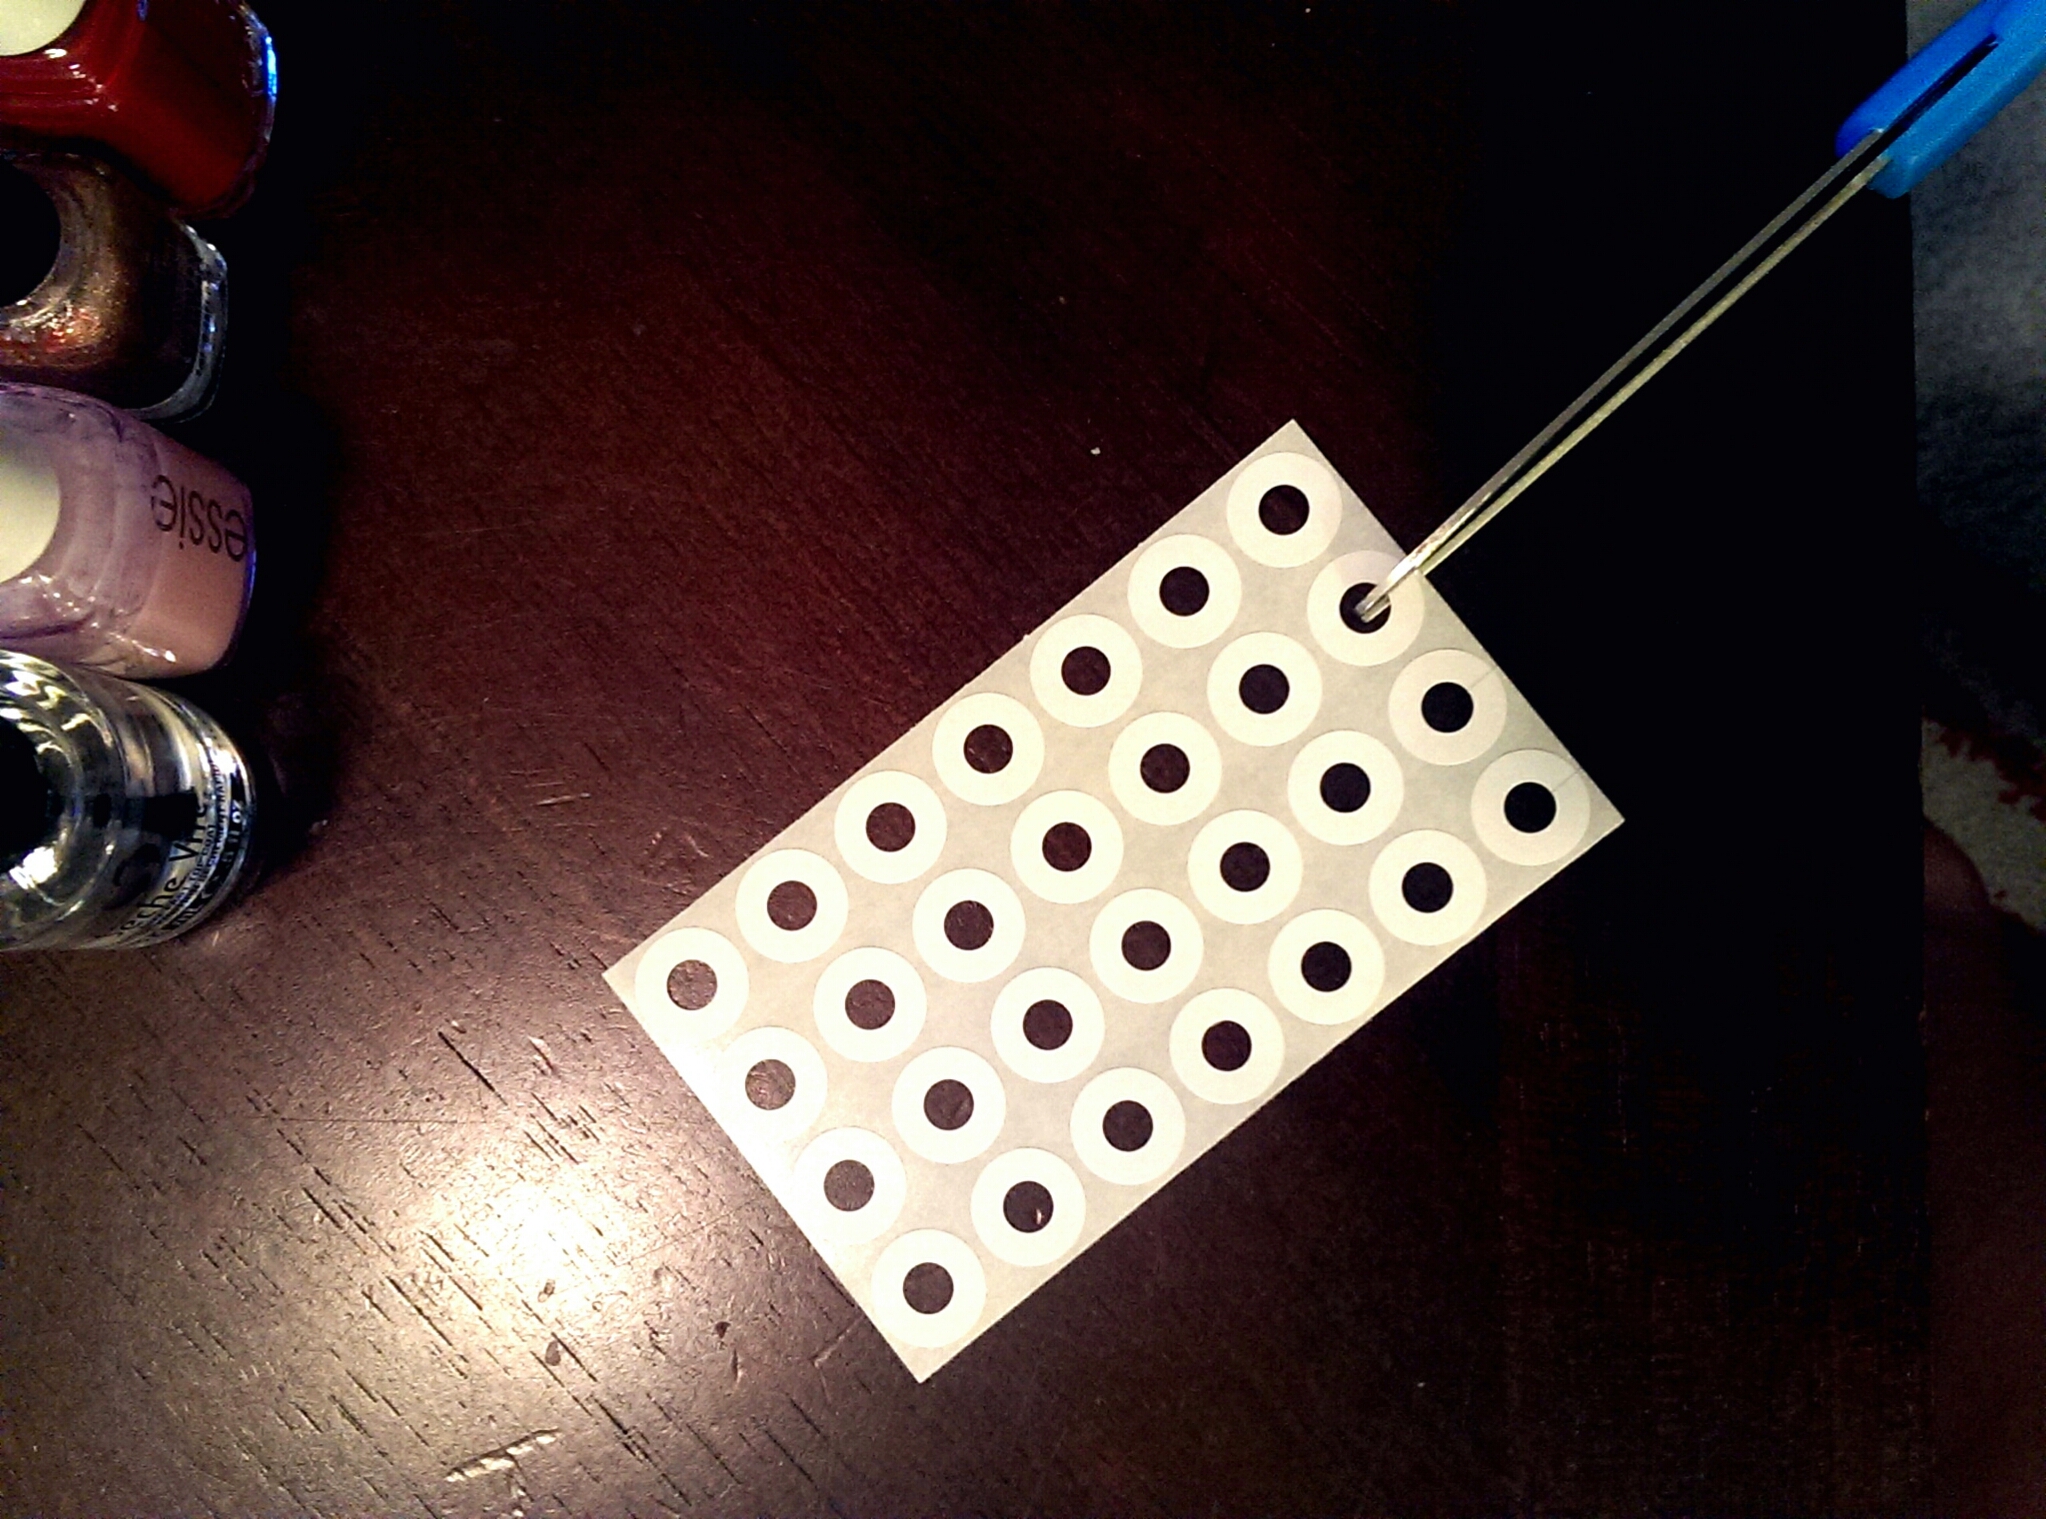
Step One: Lay out all of your materials. You’ll need a base coat, top coat, 2 complimentary polish colors, scissors, and a magazine to protect your table (not pictured).
Birchbloggers Ruffian Manicure Tutorial Step Two
Step Two: Cut one slit in ten of the reinforcement labels. Do this while the labels are still attached to the paper backing. The slit should cut all the way through the ring, leaving you with an expandable circle that can be adjusted to fit any size nail bed while yielding a consistent edge.
Birchbloggers Ruffian Manicure Tutorial Step Three
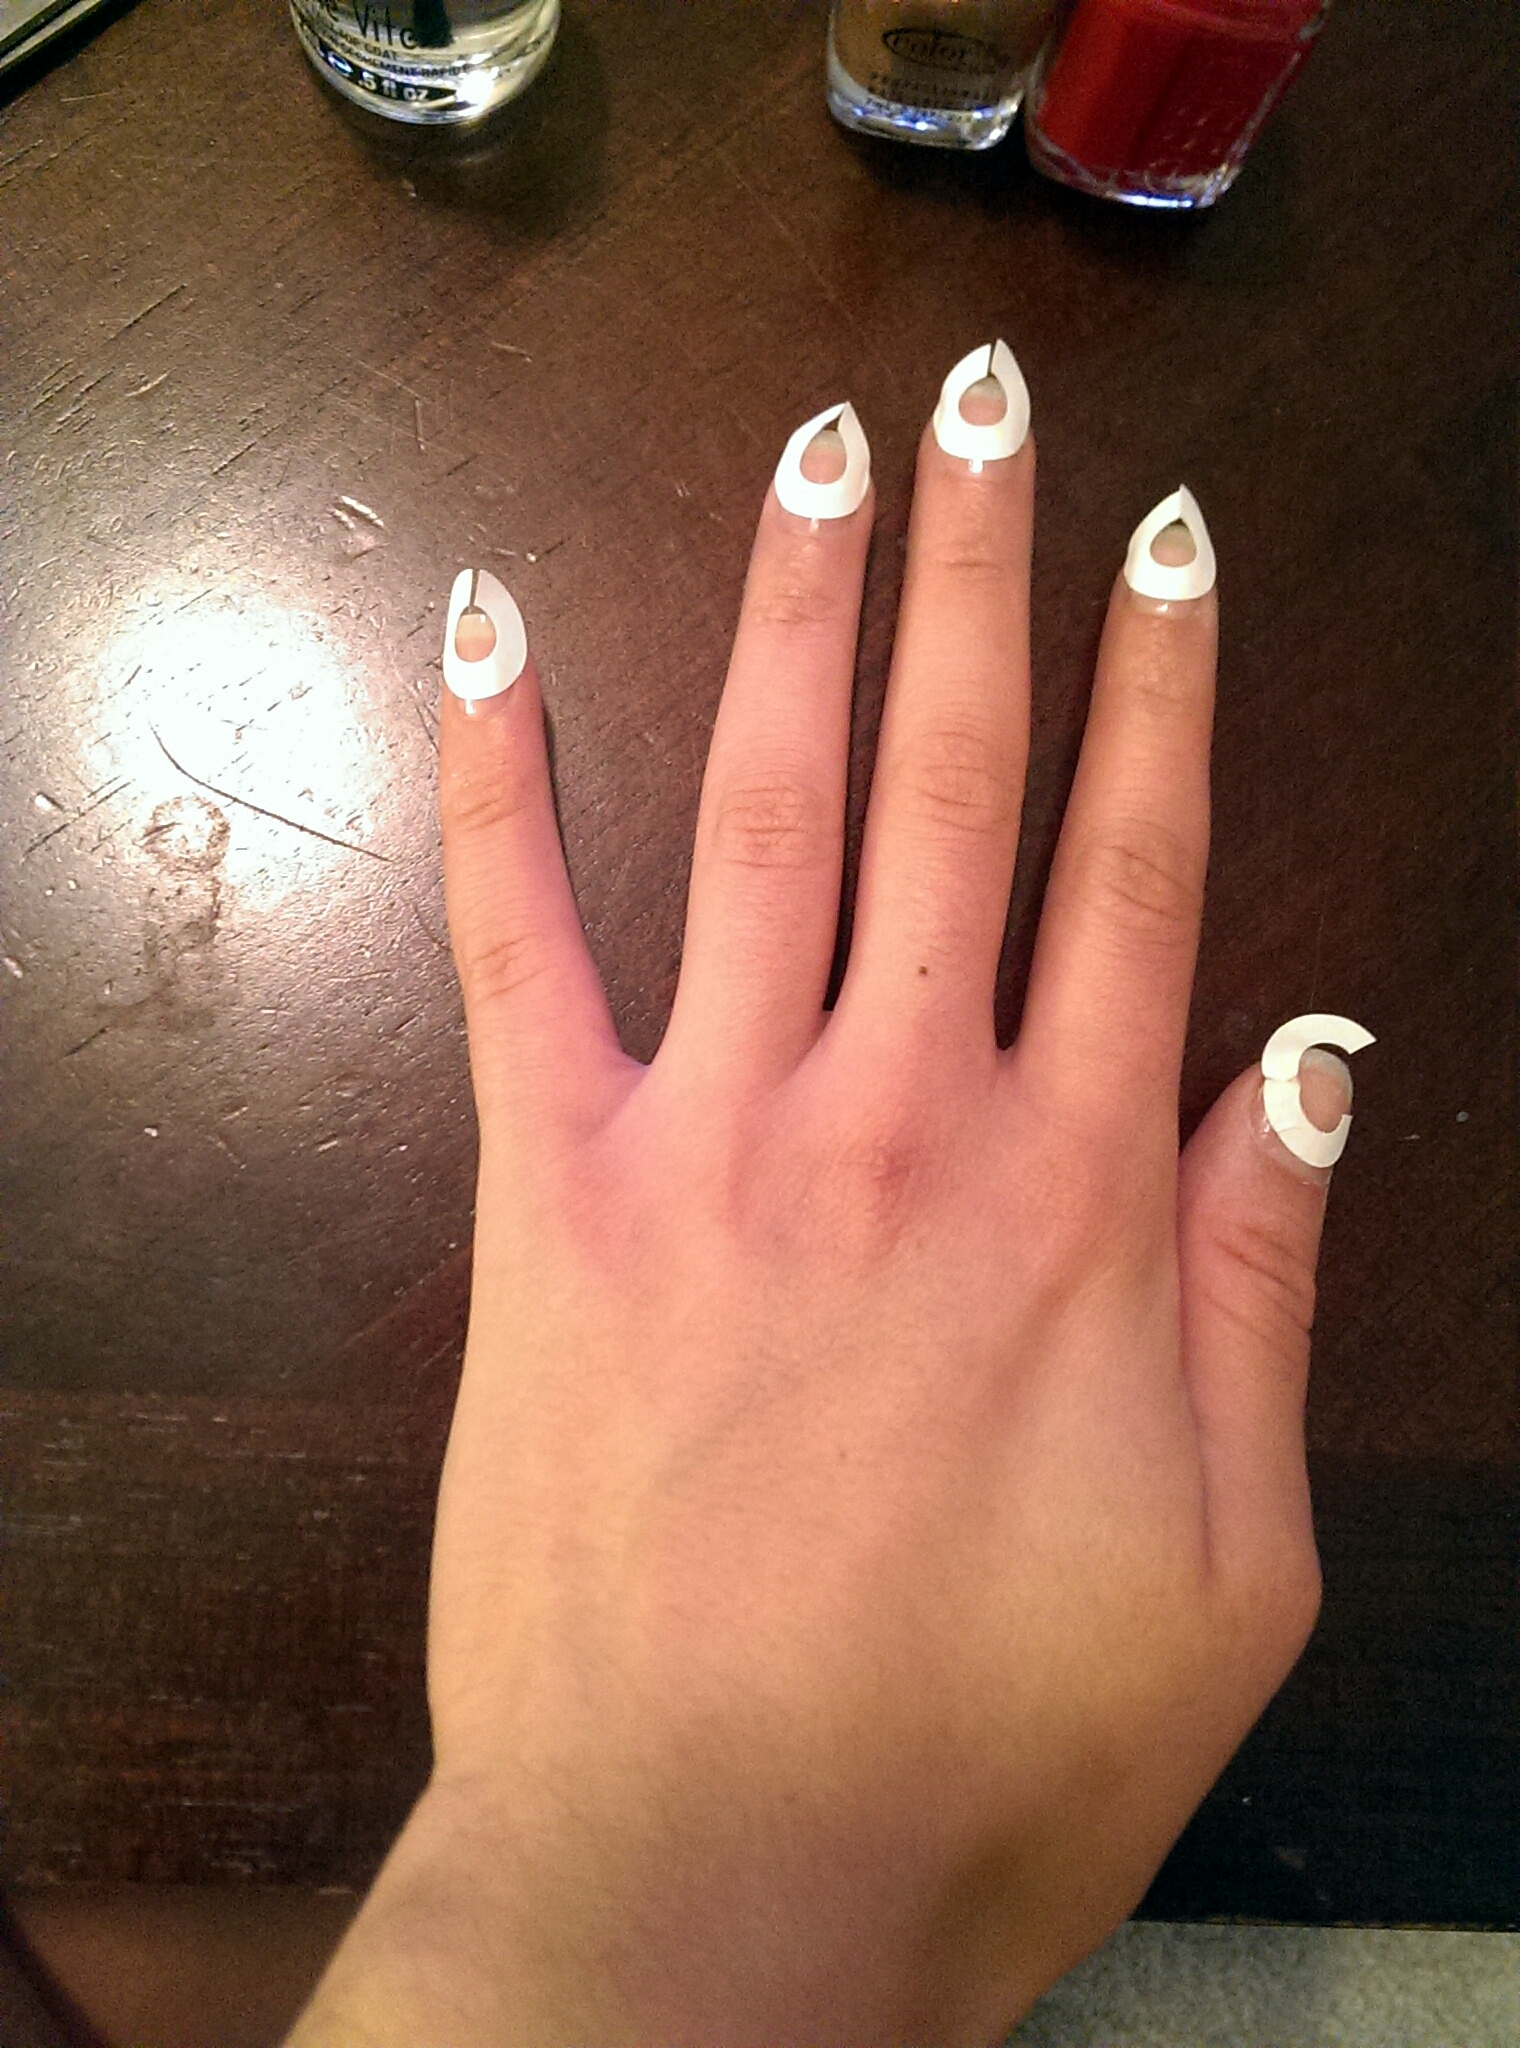
Step Three: Prep nails with base coat and let dry 5-10 minutes. Then, carefully apply the labels. Unless you have very slender thumbs, you’ll need to expand the circle slightly. Do this by pressing down the center of the label, then gently pulling each side out as far as you need to in order to make the label hit the edge of your skin. Press the edges firmly to ensure a crisp line. I created slightly smaller rings for my fingers by overlapping the edges. If the label wrinkles (it probably will on your thumb) just use your nail or cuticle pusher and smooth it out. I like to leave about one label-width between my cuticle and the bottom of the label because it creates a thin, elegant line that elongates my short nail beds. If yours are longer, you may want to leave more space to create a wider half-moon.
Birchbloggers Ruffian Manicure Tutorial Step Four
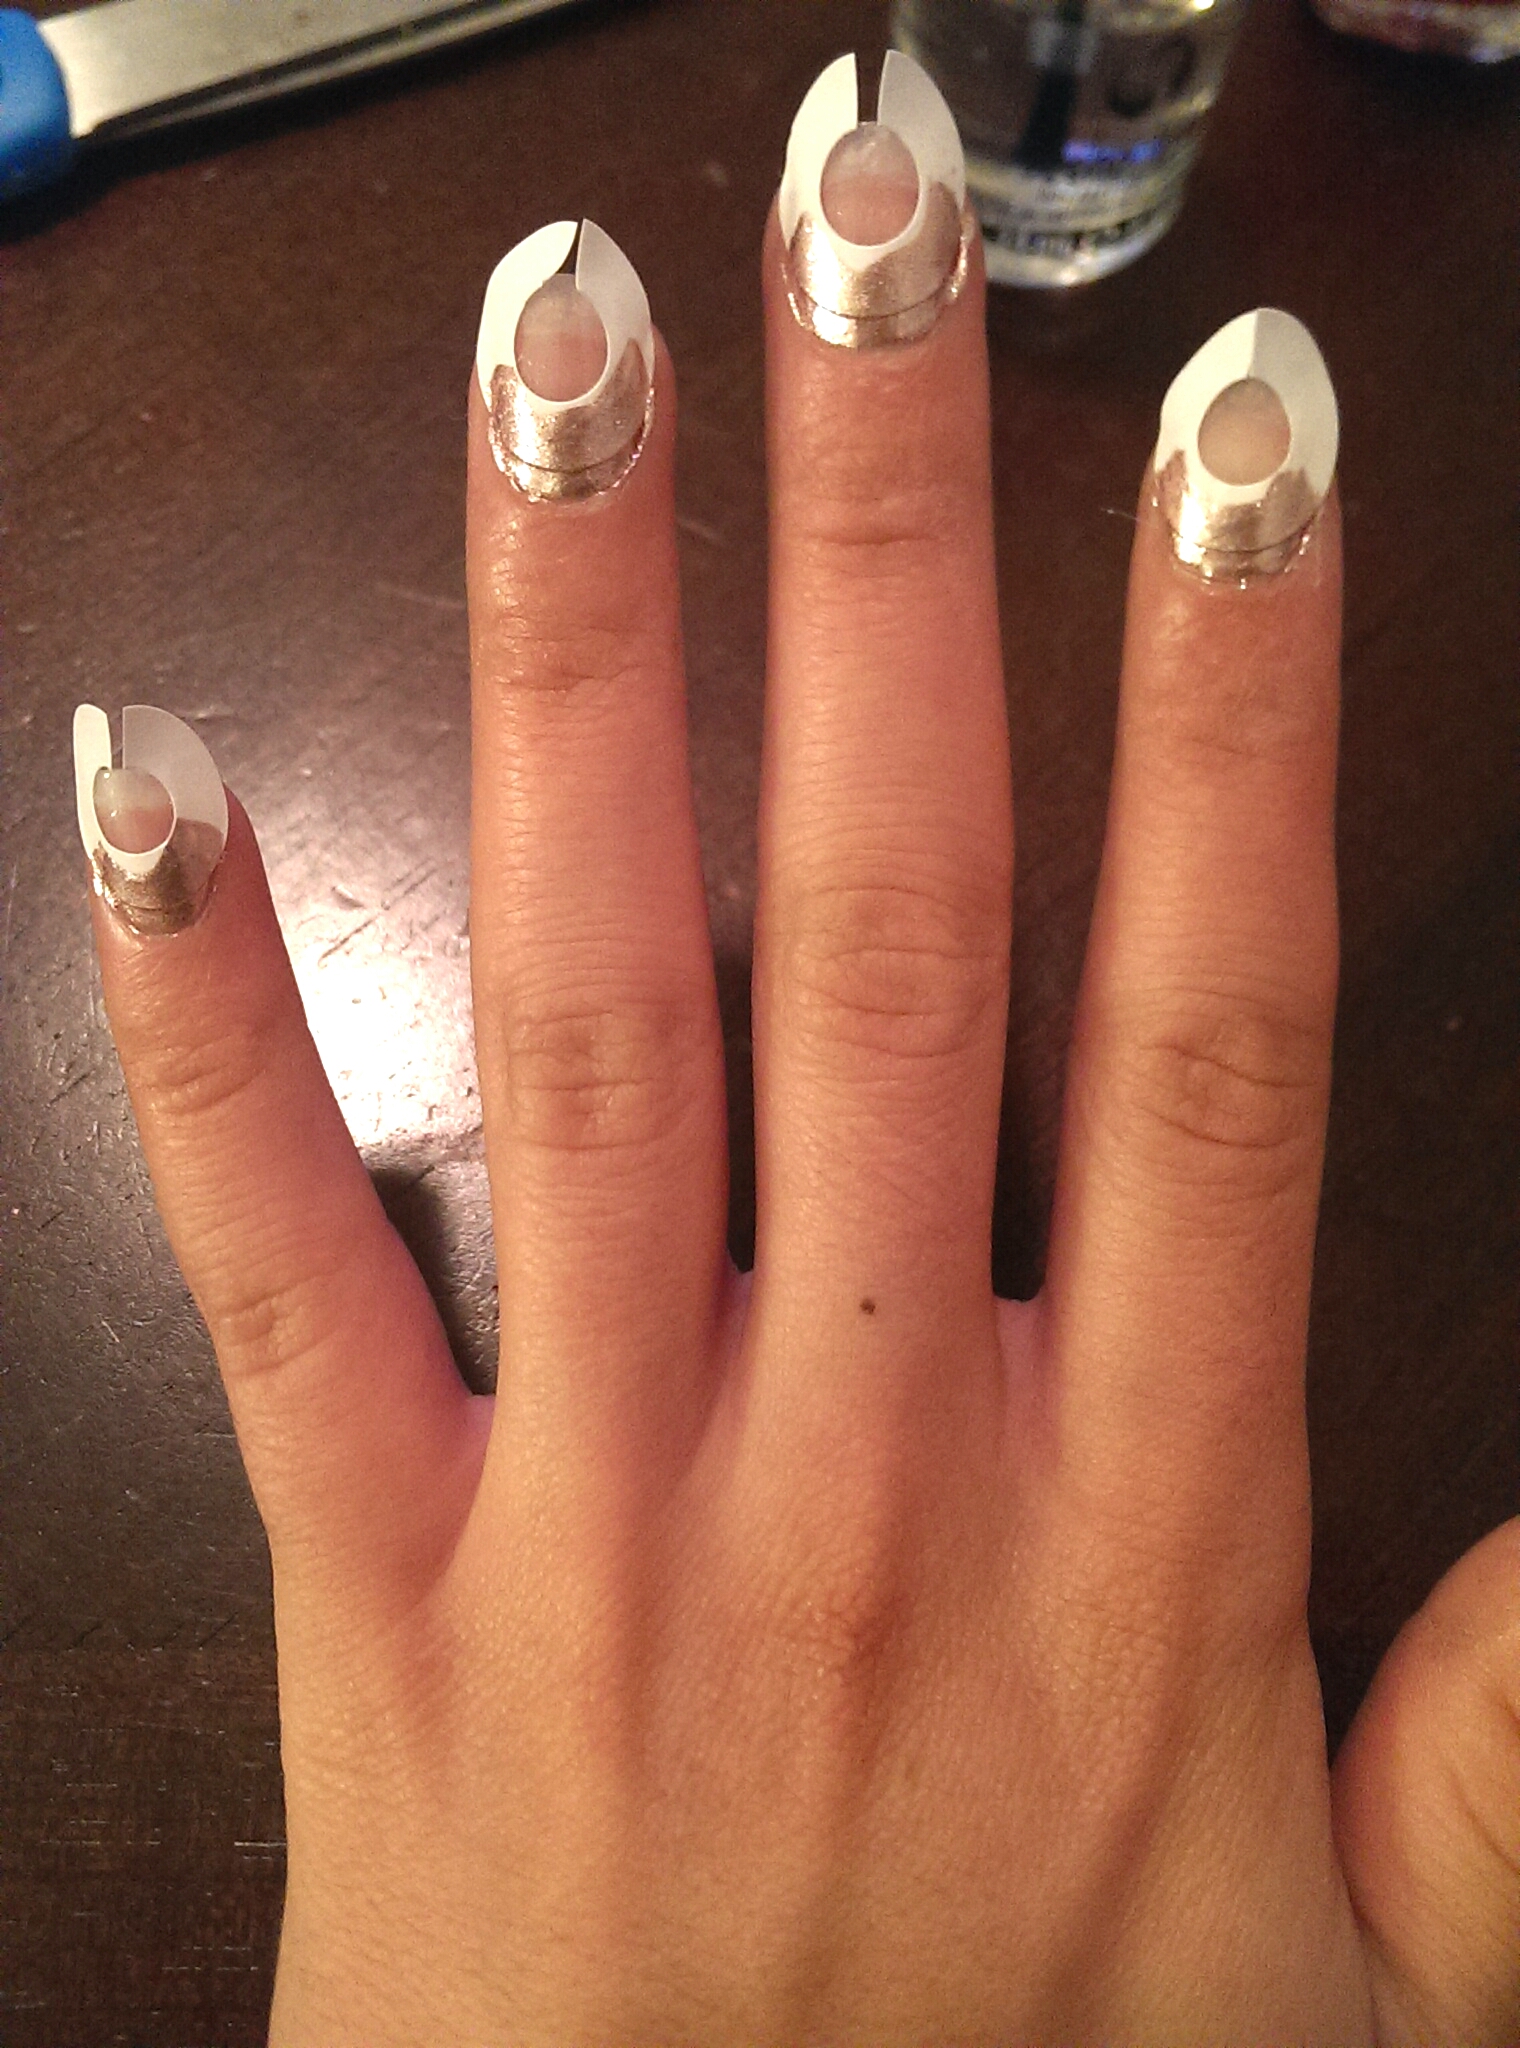
Step Four: Apply two coats of your first color. Remember that proper application begins with a small dot in the center of your nail, which you gently push back so that it almost touches your cuticles. Then, sweep out toward each side to cover completely. Unfamiliar with this technique? Check out this awesome post from Lacquerized for a detailed explanation.

Birchbloggers Ruffian Manicure Tutorial Step Five
Step Five: Carefully peel away the label. By the time you finish painting the second coat on your last digit, the first digit should be just set enough to peel away the label. You cannot leave the label on your finger until the polish is totally dry – doing so will cause the label to lift your polish right off. And this is why I like these rings so much: I was able to grab one side and lift straight up while rotating my finger in the opposite direction, which gave me a crisp, clean line.
Birchbloggers Ruffian Manicure Tutorial Step Six
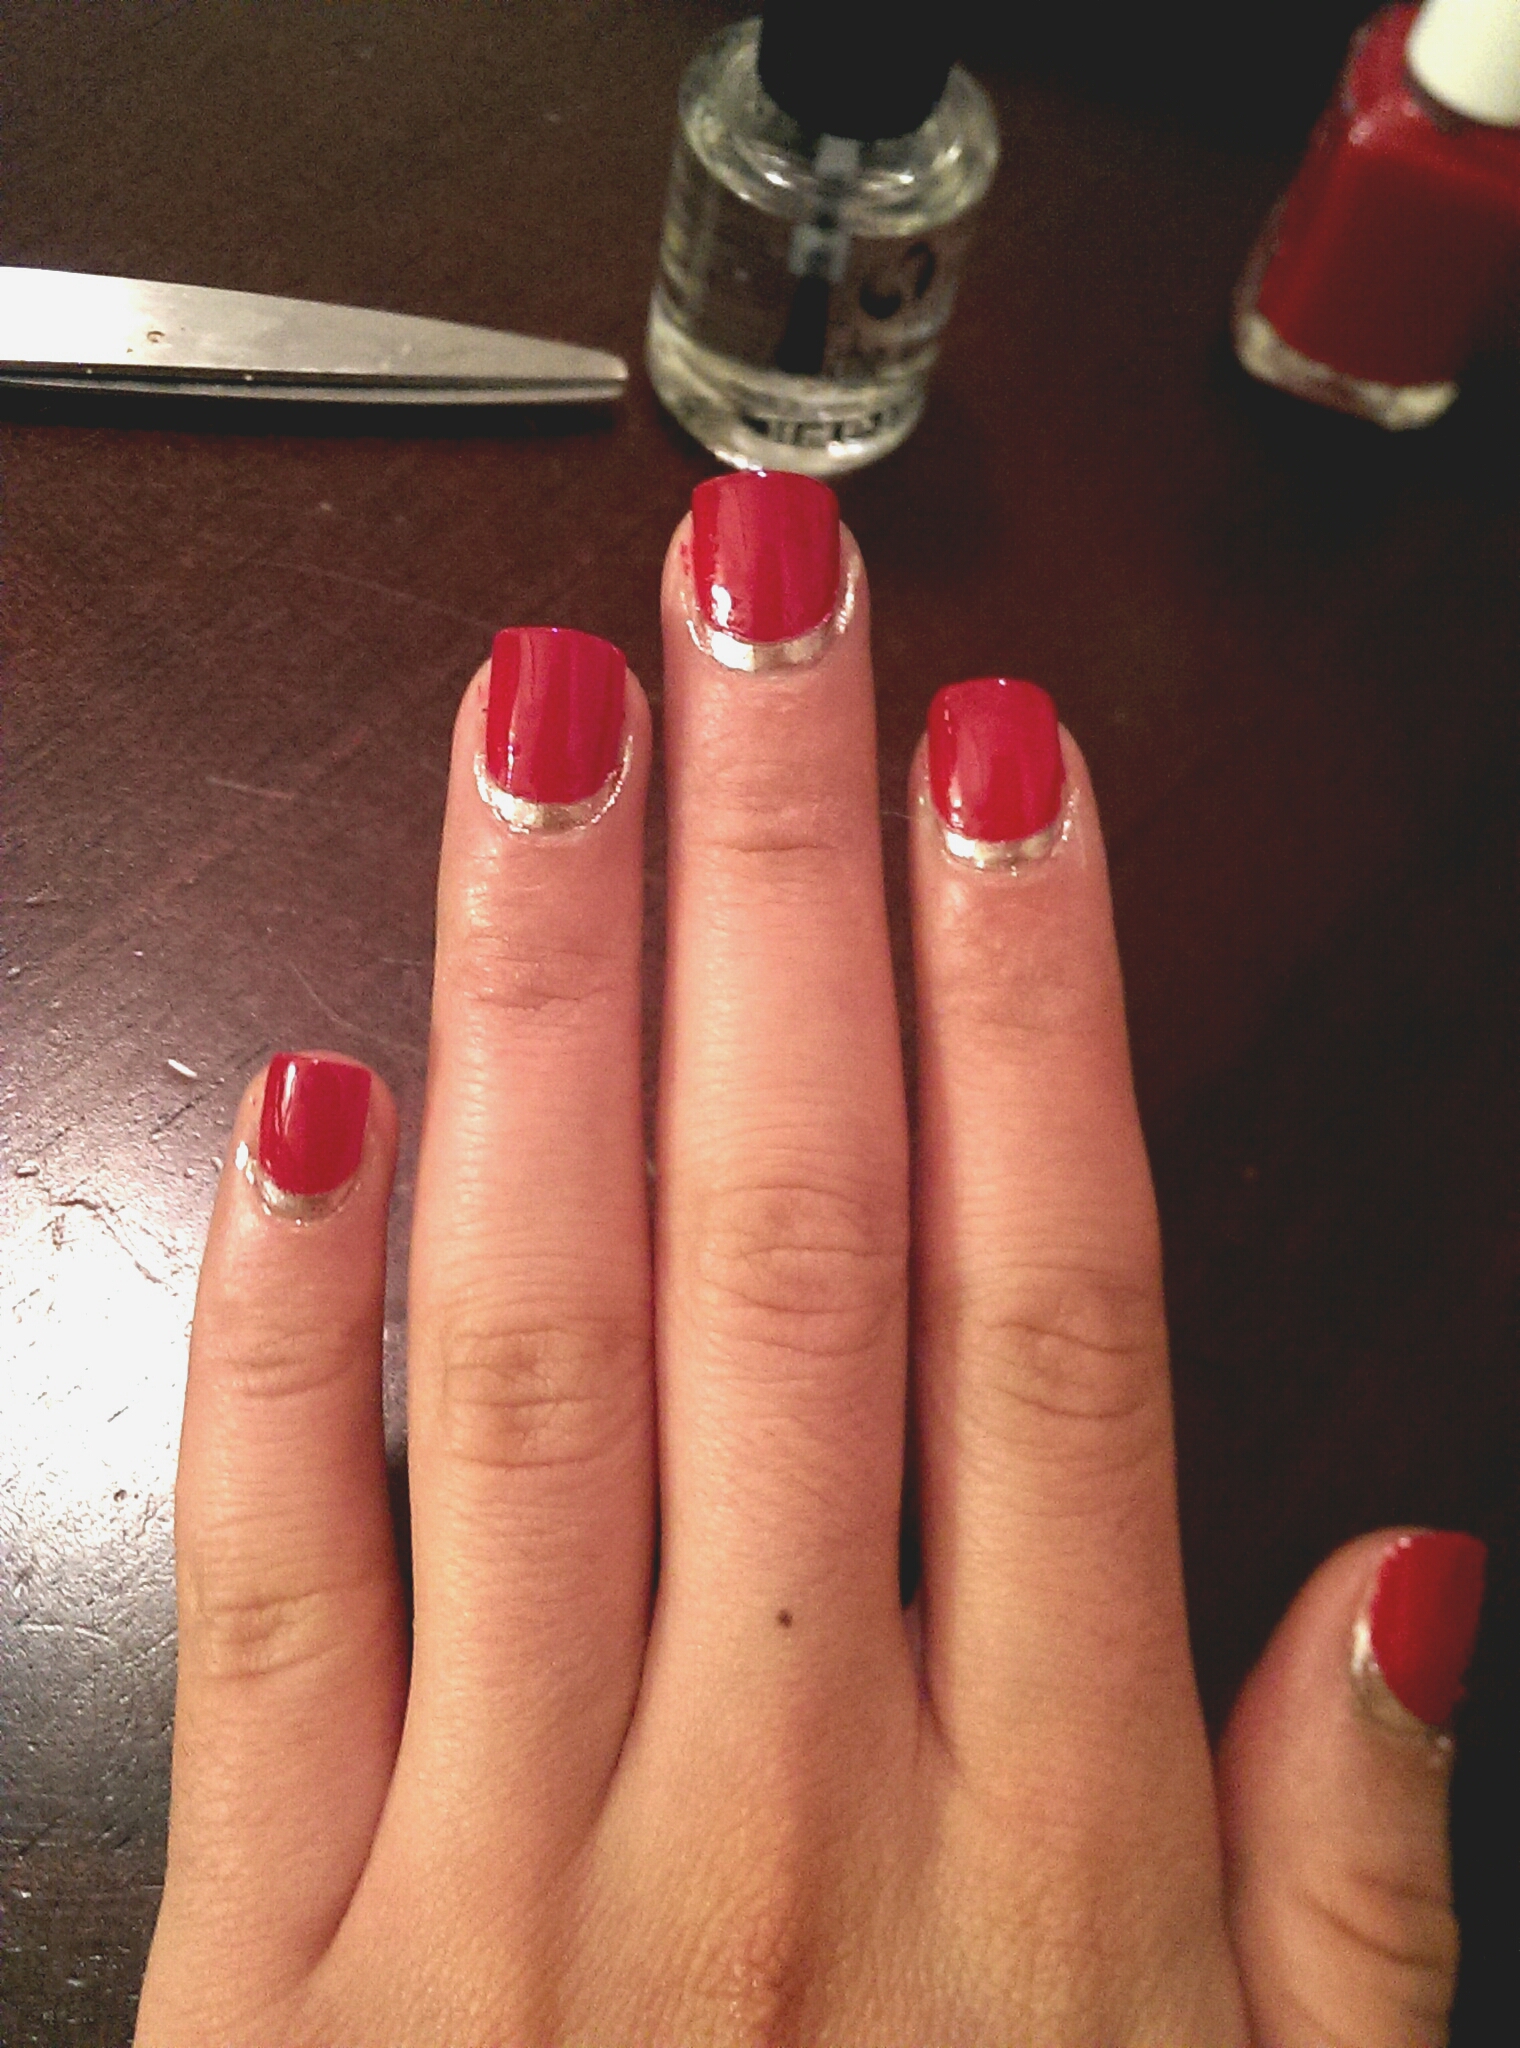
Step Six: Apply two coats of your second color. This is the time to be extra careful and extra detailed in your application. You want to push the brush back on your nail so that the second color bumps up against the first color. Removing the label will have left a ridge where the first color ends, and you want to push your second color up to that point. You should be able to feel the ridge through the handle of your polish brush, so make sure you go slowly and even the most unsteady hand will still get a perfect Ruffian Manicure.
Step Seven: Top with topcoat and pat yourself on the back.
The post ruffian manicure tutorial appeared first on whisk and heels.
]]>The post gameday snacks: open face breakfast sandwich [week 3] appeared first on whisk and heels.
]]>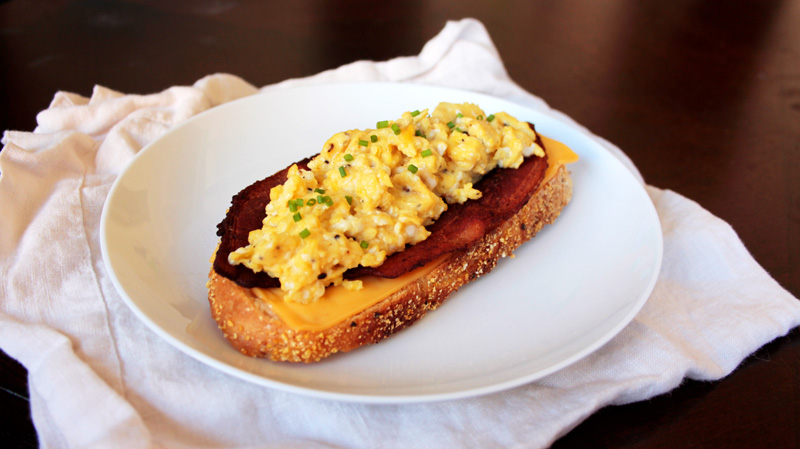
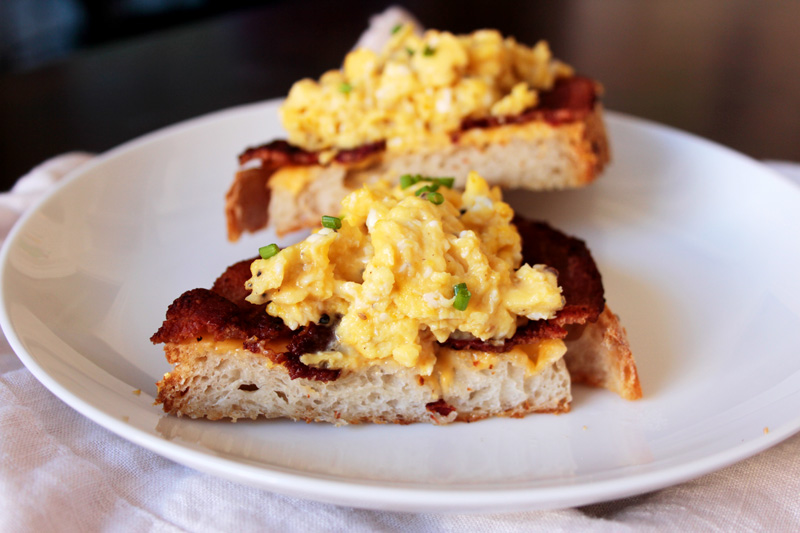
Open Face Breakfast Sandwich
There are 3 things that make this breakfast sandwich different from – and better than! – your go-to pickup:
1) Homemade bread (just plan ahead and bake it off on Saturday).
2) Slow-cooked scrambled eggs (yes, fried eggs are traditional. But do you really want to deal with runny yolk while you eat over your lap?).
3) Using bacon fat instead of butter (no additional required).
Note: I said this was delicious, not healthy/low-fat/low-carb/diet/etc. It’s Sunday, it’s early, and I presume you enjoyed your Saturday and need some help feeling human again. No? Then you’re doubly entitled to indulge a little since you were so responsible last night. Still not buying it? OK, see the recipe notes for both a vegetarian and a healthier alternative. Just please, please, please make your own bread.

Open Face Breakfast Sandwich
Note the bread to filling ratio on this beauty: the bread is sliced just thickly enough to support the weight of all ingredients and is neither cardboard thin nor Texas-toast thick. The ingredients are assembled in a way that keeps the sandwich intact, even if eaten with one hand over a napkin. The cheese layer on the bottom melts and forces the bacon to stick to it, while the weight of the eggs pushes the bacon into the aforementioned sticky cheese. Don’t worry about the eggs sliding around – they adhere to themselves after they’ve set, so once you’ve got the breakfast sandwich assembled, you should be good.
Open Face Breakfast Sandwich
ingredients
- Bread boule - 4 slices (homemade or from a good bakery. You can bake your bread the morning of or the night before.)
- Cheese of your choice - 8 deli-size slices (I used American)
- Bacon - 8 slices
- Eggs - 8
- Salt
- Pepper
instructions
- Mise en place, and read this recipe all the way through.
- Crack all eggs into a large bowl and season with a big pinch of salt and a few grinds of pepper. Beat lightly with a fork or whisk and set aside.
- Fry up your bacon in a large non-stick skillet. Depending on size, you may need to do this in 2 batches.
- Drain the rendered fat into a heatproof vessel and wipe out any residue (do this after each batch to avoid burning).
- Allow the pan to cool by removing it from the burner it was on while you complete the next step.
- Brush one side of each slice of bread with bacon fat and set aside, brushed side up.
- Return the nonstick skillet to the stove and set over low heat.
- Add 1 TBSP of reserved bacon fat to the skillet and swirl to coat.
- Pour in eggs, and immediately start stirring with a heatproof spatula or wooden spoon.
- Cook over low heat until the eggs are just barely set. They may look a little runny, but they'll continue to cook while they're assembled and kept warm in the oven.
- Transfer the eggs to a large bowl and wipe the pan clean of any egg residue.
- Place 2 slices of bread fatted side down in the same skillet over medium-low heat.
- Add 2 slices of cheese and 2 slices of bacon to each, then top with one fourth of the scrambled eggs.
- Cook just until the cheese melts, then carefully transfer to a 200 degree oven and repeat with the remaining ingredients.
Notes
These can be assembled 30 minutes ahead of time and kept warm in a low oven if the eggs are slightly underdone. To make this vegetarian, use soy bacon and brush the bread with softened butter. To make this healthier, replace the cheese with avocado and use tomato in place of bacon; toast the bread and assemble.
Dare to be different! Try different cheeses (the deli will generally sell you anything they put on sandwiches), different breakfast meats, and different flavor profiles. Let me know what combinations you come up with!
The post gameday snacks: open face breakfast sandwich [week 3] appeared first on whisk and heels.
]]>