10 superbowl recipe ideas

10 Superbowl Recipe Ideas

Whether your response to this year’s Superbowl Sunday is, “yay, commercials!” or “I can’t wait to see Richard Sherman get pummeled,” let’s approach the Greatest Game of the Season with the mutual understanding that we will all eat way too much food.  With that in mind, we need to make sure that we’re eating way too much really delicious food.  I am in the process of moving, and unfortunately that means my kitchen is out of commission.  I’m actually surprised that I haven’t gone completely crazy yet.  If I WERE hosting a Superbowl party, these are some of the recipes I would be making (click the image to get to the source)!  Help a girl out and try a few? Thanks.  Me?  Yeah, I’ll be in the bar hoping that my boxes magically unpack themselves…

Dine Up Delish's Taco Cups

Dine Up Delish’s Taco Cups

Smitten Kitchen's Ethereally Smooth Hummus

Smitten Kitchen’s Ethereally Smooth Hummus

Red Shallot Kitchen's Baked Chicken Flautas

Red Shallot Kitchen’s Baked Chicken Flautas

Sally's Baking Addiction's Crispy Baked Onion Rings

Sally’s Baking Addiction’s Crispy Baked Onion Rings

Cheap Recipe Blog's Buffalo Chicken Wontons

Cheap Recipe Blog’s Buffalo Chicken Wontons

Baked Bree's Chocolate Chip Cake with Chocolate Chip Frosting

Baked Bree’s Chocolate Chip Cake with Chocolate Chip Frosting

My Own Buffalo Chicken Pizza Bites

My Own Buffalo Chicken Pizza Bites

Just a Taste's Pepperoni Pizza Pull Apart Bread

Just a Taste’s Pepperoni Pizza Pull Apart Bread

My Own Fried Ravioli

My Own Fried Ravioli

My Own Mac And Cheese Cups

My Own Mac And Cheese Cups


dark chocolate pound cake

…with chocolate chips.  Because sometimes, you just need some chocolate, okay?

Dark Chocolate Pound Cake

Dark Chocolate Pound Cake

For most of us corporate folks, this past week was the first full work-week since mid-December.  Five whole days, uninterrupted by a Tuesday or Wednesday holiday… no matter how much you love your job, going from vacation mode to full-blown work-mode can definitely be a rough transition.  And in times of peril, we turn to chocolate.  Lots of chocolate…. in the form of dark chocolate pound cake loaded with chocolate chips.

Dark Chocolate Pound Cake

Dark Chocolate Pound Cake

I use the term “pound cake” with reservations here.  This cake has a more crumbly crumb than a traditional pound cake, but it follows a more traditional pound cake recipe than chocolate loaf recipe because there are no chemical leaveners.  Call it what you will, it’s super chocolatey, super dense, and super moist.  You will definitely need milk.

Dark Chocolate Pound Cake

Dark Chocolate Pound Cake

I kept the cake moist by adding buttermilk to the batter.  Usually dairy mellows chocolate flavors, but in this case, I found that the tang of the buttermilk not only helped keep the cake moist, but also helped contrast and emphasize the flavors of the chocolate and the coffee.  Yes, the coffee.  I added a healthy dose of instant coffee to the batter to help enhance the flavor of the chocolate, and to make the cake more appropriate for breakfast consumption.  I’m serious.  I feel like as long as there is coffee in the batter, I can call it a breakfast mocha dark chocolate pound cake.  But mostly, I can feel less guilty about starting my morning with cake.

dark chocolate pound cake

prep time: 20 minutes

cook time: 1 hour

ingredients

  • 1 1/2 C cake flour
  • 1/4 tsp table salt
  • 1/4 C Dutch processed cocoa
  • 1/4 C boiling water
  • 2 oz semisweet chocolate, cut into small pieces
  • 2 TBSP instant coffee granulates (decaf or regular)
  • 1 tsp vanilla extract
  • 1/2 C buttermilk
  • 1 C unsalted butter, at room temperature
  • 1 C granulated sugar
  • 3 egg yolks, at room temperature
  • 8 oz chocolate chips (semisweet or milk, your choice)

instructions

  1. Mise en place, and read this recipe all the way through.
  2. Remove 1 tsp of flour and toss chocolate chips in it. (This will prevent them from sinking to the bottom)
  3. Whisk together the remaining flour, and salt. Set aside.
  4. Combine cocoa, chocolate, and instant coffee in a small bowl. Pour boiling water over the mixture and whisk until smooth. Set aside to cool.
  5. Stir vanilla extract into buttermilk and set aside.
  6. Cream butter and sugar until light and fluffy, about 5 minutes. Scrape down the side of the bowl as needed.
  7. Add egg yolks one at a time, beating into a homogenous mixture after each addition.
  8. Add the cocoa mixture and beat until completely combined. Scrape down the sides and bottom of the bowl to make sure that there are no streaks in the batter.
  9. Add the flour and buttermilk in 5 additions - 3 parts flour, 2 parts buttermilk. Start by adding 1/3 of the flour mixture with the mixer on low speed. Beat until it almost disappears, then add 1/2 of the buttermilk mixture. Repeat with the flour, then buttermilk, and finally finish with the flour. Mix until just combined.
  10. Add the chocolate chips (coated in flour) to the batter and fold in with a spatula. Make sure the chips are evenly distributed, but try to do this in the smallest possible number of turns of your spatula. Overmixing will lead to a tough cake!
  11. Transfer to a loaf pan that has been buttered and lined with buttered parchment paper.
  12. Bake at 350 for 55-65 minutes, until the cake springs back when poked gently, or a toothpick inserted in the center of the cake comes out with only a few crumbs.
  13. Let cool in pan for 10 minutes, then remove and let cool completely on a wire rack.
  14. Slice and serve, or wrap tightly in plastic wrap and foil, and freeze for up to 1 month.

Notes

Adapted from Joy of Baking and Cook's Country via Tracey's Culinary Adventures

http://whiskandheels.com/kitchen/dark-chocolate-pound-cake

Happy eating!  Let me know if you have any questions about this recipe in the comments below.

baked samosas (and a brief lesson on Indian ingredients!)

Full disclosure: I am Indian.  Let me be the first to tell you that these are not traditional samosas.  I feel okay about that because they taste really good.  I also feel guilty for sometimes being a little judgey towards my beloved ATK when they use non-traditional ingredients in ethnic cuisine…oops.

Baked Samosas

Baked Samosas

I decided to pursue the non-traditional path because of my grandma.  Every time I go to visit her, she has her freezer stocked with frozen samosas, and the brand she buys uses phyllo dough.  I wanted to create a recipe that reminded me of my sweet grandma and the time I’ve spent hoarding samosas on her couch.  I’ve included a list of deviations from a traditional samosa recipe for educational purposes (mostly so you can hold your own against any Indians that ask you how you made them!).

  1. There’s no ground ginger or minced peppers.  Why, you ask?  Because I neglected to put either on my grocery list, and I was too lazy to go back.  I already had my fuzzy slippers on, okay?
  2. I used phyllo dough in place of the traditional roti/chapati (different words for Indian flatbread, thinner than – and in my opinion, inferior to – naan).  I knew I wanted to bake these (see #3), and the traditional dough would have to be swapped for butter-heavy pastry in order to yield a similar texture.  The phyllo dough seemed to be the least fattening baked alternative.  For the record, samosas are typically fried in oil that starts at a low temperature and is gradually raised – this yields a crispy exterior and a soft interior.  If you fry often, you know that an oil temperature below 350 results in whatever you’re frying absorbing the oil.
  3. I didn’t fry them.  It’s January.  I know you guys are not looking for a fried-food fest right now.  (PSA: these are not low fat. Sorry.  Still better than ordering takeout.)
Baked Samosas

Baked Samosas

If you’re okay with all of the aforementioned deviations, I think you’ll really enjoy this recipe.  I do have one major recommendation for you: if you don’t have Indian spices in your spice cabinet, I suggest that you adventure over to an Indian market to purchase them.  If you’re in an area that doesn’t have any Indian markets, you could very nicely ask your local Indian restaurant for the chaat masala and garam masala, or you could buy them online.  And just in case you are super new to Indian cuisine and/or Indian cooking, I’m going to put some more info about the spices and cuisine after the recipe, so make sure to keep scrolling down if you’re interested.

Baked Samosas

Baked Samosas

baked samosas

yield: 10

ingredients

    For the Filling
  • 3 russet potatoes, boiled, peeled, and diced 1/4 inch
  • 3 TBSP ghee (clarified butter; available at most supermarkets)
  • 1 medium onion, 1/4 inch dice
  • 2 cloves garlic, minced
  • 1/2 tsp garam masala
  • 1/2 tsp turmeric (optional; for color only)
  • 1/4 tsp cayenne pepper
  • 1 tsp brown mustard seed
  • 2 tsp chaat masala
  • 1/2 tsp chili powder
  • 1/3 - 1/2 C frozen peas
  • salt to taste
  • To Assemble
  • Phyllo dough, thawed and unrolled
  • 8 TBSP ghee, melted
  • 1 egg, lightly beaten with 1 TBSP water

instructions

  1. Mise en place, and read this recipe all the way through.
  2. For the Filling
  3. Combine all spices in a small bowl. Set aside. Do not include any salt, you will add this to taste later.
  4. Heat 3 TBSP ghee in a large skillet. Add onions, and cook until the edges are lightly browned.
  5. Add garlic and spice mixture and cook until fragrant, about 1 minute.
  6. Add potatoes and stir to coat completely. You do not need to be too gentle when stirring, it's ok to break up some of the potatoes.
  7. Remove from heat and add desired amount of frozen peas. The heat of the potatoes will warm the peas, while the frozen peas will help cool the entire mixture.
  8. Add salt to taste, and let the mixture cool completely.
  9. To Assemble
  10. Lay one sheet of phyllo down vertically. Brush with a small amount of melted butter, and lay a second sheet directly on top of the first. You only need enough butter to help the phyllo sheets adhere; the entire sheet does not need to be coated in butter for this to happen.
  11. Spoon 2 1/2 - 3 TBSP cooled filling onto the bottom left part of the sheet and form into a triangle (see image below).
  12. Brush the phyllo with butter, and fold in half so that you have one long column.
  13. Brush the phyllo with butter, and fold the triangle at the bottom right up so that it is on top of the filling (see image below).
  14. Fold the triangle up, then over to the right, then up, then over to the left. Continue folding until all of the dough has been folded over the filling.
  15. If needed, brush butter over the top and edges of the samosa to help seal it.
  16. Transfer to a rimmed baking sheet and repeat until all samosas have been rolled.
  17. Brush the tops of all samosas with the egg wash, and bake in a 400 degree oven for 15-20 minutes, until golden brown.
  18. Serve immediately, or cool completely and refrigerate overnight to reheat and serve the following day. Serve with chutney, mint-cilantro dipping sauce, or spicy pickle.
http://whiskandheels.com/kitchen/baked-samosas

So you’ve seen the photos and the recipe, but may still have some questions about the spices and how a traditional samosa is made.  Wikipedia has some interesting information on where samosas originated and the regional varieties that can be found around the globe. As you can see, the traditional Indian samosas look nothing like the ones I made.  The dough used is similar to a pizza dough, but does not contain any yeast.  Many recipes that I found actually called for a pastry dough more akin to a pie crust than a pizza dough, which is no more traditional than the phyllo dough I used in my recipe.  You may also be wondering what “masala” is, and why it’s part of both spice names and popular dishes (like tikka masala and masala chai).  “Masala” really just means “spice mix.”  Masala chai is the traditional black tea steeped in milk and brewed with spices like cardamom, clove, and cinnamon.  Tikka masala is a dish (usually chicken but can also be paneer, which is cheese) that is served in a tomato and cream sauce flavored with lots of delicious spices.  In my opinion, it is the penne alla vodka of Indian cuisine.

So why did I tell you to use garam masala AND chaat masala?  And what is chaat?   Garam masala is a pretty standard spice mixture used in Indian cuisine.  An Indian household would, most likely, mix their own garam masala using pungent spices such as cinnamon, cardamom, cumin, and pepper.  Chaat masala is essentially garam masala mellowed with the addition of mango powder, chili powder, and salt.  Chaat masala has a more balanced flavor than garam masala, and is traditionally used to season various chaat, or street snacks.

I hope you enjoyed the recipe and found the additional details to be helpful!  Happy eating, and please, let me know how the recipe works for you in the comments below.

december birchbox & post-party skin recovery

2013 has been a year of challenges interspersed with moments of bliss with the people I am so fortunate to call my close friends and family.  I would say my biggest accomplishment this year has been this little blog, and the amount of learning that has taken place since we launched 5 months ago.  I’m not usually one for resolutions, but for 2014 I do resolve to start featuring street style and beauty tutorials on here… I had all of one style-related post in 2013, and I’m not super pleased with that.  So peace out, 2013, and cheers to 2014: a year of continued growth!

In the meantime, this will be my final post of 2013 – and how fitting that the topic is my favorite sample subscription box: Birchbox.  This month’s box featured 5 fantastic products that have made me feel fabulous, but most importantly, 3 of these products will be essential to my skin recovery plan for January 1st (well, 2 for skin recovery and one to make me look alive again!).

Once again, I had an incredibly hard time picking a favorite.  I’ll give you the rundown on the box as a whole while I decide which product to feature.

Ahmad Tea: I am a sucker for tea and fruit.  The mango was my favorite; I drizzled a touch of honey for some added sweetness, then pretended to be on a beach in India.  Painful snap back to reality when my mug was empty…

Klorane Gentle Dry Shampoo with Oat Extract: Hardly any scent (my preference for dry shampoo) and no white gunk on my fingertips after working it in.  This one earned a spot on my dry shampoo shelf for sure.

dr. brandt BB matte with signature SHINEARASE: I managed to shine through this, even with a powder finish.  I still liked how little product I needed in order to achieve a flawless face (using a BeautyBlender helps with this).

BeeKind Body Lotion: Absorbs instantly and has the lightest, gentlest scent of lime zest and honey.

Vitivia Vitamin Capsules:  This is it.  This was my favorite product this month, and the one that my skin recovery plan hinges on.

Vitivia Pro:Vitamin A15

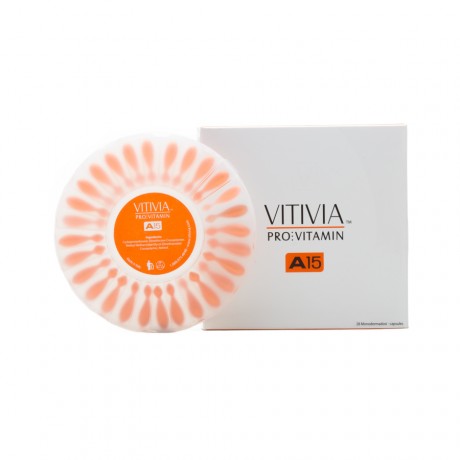
Vitivia Pro:Vitamin A15 (Image From Birchbox)

These little capsules are made of biodegradable materials and help keep the pure vitamin jelly inside fresh for facial application.  Good luck trying to buy these right now – they’re sold out, and with good reason.  My sample pack came with a few of the A15 capsules and a few of the C10 capsules.  I saw the biggest results from the A15, but to be fair, my skin does suffer more from dullness than from wrinkles or sun spots, which the C10 specifically targets.  The A15 capsule left my skin brighter, softer, and healthier looking after it sunk in.  I am bulk-buying these little vitamin packs as soon as they are back in stock!

Post-Party Skin Recovery Plan

Whether you lingered at the bar longer than you should have, or just spent the night in an intensely air-conditioned (or heated!) space, your skin is going to be grumpy with you the next morning.  Especially so if you didn’t wash and moisturize your face before you fell into bed.  Here’s my plan for nursing my skin back to health on January 1st!
(I am not a doctor or dermatologist. You should consult with a professional about your own skin and healthcare routines; this is just what works for me personally.)

  1. Go for a nice steam in the shower.  Pat skin dry, and apply your favorite cleansing mask.  I like GlamGlow’s Supermud.
  2. While the mask dries, massage a rich moisturizer all over your body.  Your face will show skin fatigue most obviously, but that’s no reason to neglect the rest of your body.  BeeKind will absorb into your skin before it’s time to remove the mask.
  3. Remove mask according to package directions, and pat skin dry.
  4. Mist face with your favorite toner.  Let dry.
  5. Apply pure vitamin A, like Vitivia A15, and let sink into skin.
  6. Dot eye cream beneath your eyes and follow with your favorite daily moisturizer.
  7. Smooth on your favorite BB cream, like dr. brandt’s bb matte, to add some color back to your complexion if needed.  If not, try to avoid wearing makeup.
  8. Drink tons of water.  A good coconut water has lots of electrolytes and no added sugar (read the label carefully); this will help jump start your rehydration.  Hydrated skin is happy skin, while dry skin is more prone to irritation and breakouts.

I hope you all have a very happy entry into 2014!  Thank you for spending part of your 2013 with me :)

gameday snacks: cheesiest cheddar popcorn [week 17]

It’s the last week of the regular season!  This means that my gameday snacks series has officially been a success – big, HUGE thanks to all of you for coming back every Sunday to read what I’ve written.  I’ve published (including this post) 16 delicious recipes for you and your friends to enjoy on NFL Sunday (/Monday/Thursday), and have hopefully encouraged you to explore your own creativity in the kitchen.  Your top 3 favorite recipes this season were:

1. Mac & Cheese Cups (Week 2)

Mac and Cheese Cups

Mac and Cheese Cups

2. Spinach and Roast Chicken Lasagna Cups (Week 1)

Spinach and Roast Chicken Lasagna Cups

Week 1: Spinach and Roast Chicken Lasagna Cups

And last but not least (and the only top recipe from the 2nd half of the season!)…

3. Fried Ravioli

Fried Ravioli

Fried Ravioli

So now for this week’s special treat: cheddar popcorn.  This is a copycat recipe, and my attempt at bringing my favorite Chicago treat, Garrett Popcorn, into my own kitchen.  If you’ve never been to Chicago, just imagine the best cheddar popcorn you’ve ever tasted, and that’s Garrett’s cheddar popcorn. You can order a tin online if you want a firsthand experience without the Chicago trip.  The Chicago mix is their staple and is half cheddar popcorn and half caramel corn… I’m not huge on the latter, so I chose to recreate the cheddar half only.

Cheddar Popcorn

Cheddar Popcorn

All things considered, this recipe was actually incredibly easy.  I found a foolproof stovetop popcorn method over at Simply Recipes, which left me with just one un-popped kernel in the entire batch.  You’ll need to cook your popcorn in 2 batches, otherwise your pan will overflow – a potentially dangerous situation considering the ingredients are hot oil and a food that explodes during the cooking process.

Cheddar Popcorn

Cheddar Popcorn

I packaged my leftover popcorn up in a tin and brought it to a friend’s house for a holiday treat.  They were shocked that I was able to create such a classic taste, and even more surprised when I told them how easy it was.  The only tricky part of this recipe is the procurement of the cheddar powder.  Most specialty spice shops should carry it – if there is not one near you, you should be able to order some online.  Keep an eye out for other cheeses, too!  I’ve seen powdered Asiago, American, Cheddar, and Parmesan.  If you’re not into cheddar, pick the cheese you like best and try using it instead.

Cheddar Popcorn

Cheddar Popcorn

cheesiest cheddar popcorn

prep time: 5 minutes

cook time: 10 minutes

total time: 15 minutes

yield: serves 4-6

ingredients

  • 2/3 C popcorn kernels, divided
  • 6 TBSP vegetable oil, divided
  • 6 TBSP unsalted butter
  • 2/3 C cheddar cheese powder
  • 1 tsp dry mustard
  • 1/4 tsp cayenne pepper (optional)

instructions

  1. Mise en place, and read this recipe all the way through.
  2. Stir together the cheddar powder, dry mustard, and cayenne pepper (if using). Set aside.
  3. Heat half the oil + a few corn kernels in a 3 quart covered saucepan.
  4. When the kernels pop, remove the pan from the heat and add half of the kernels (1/3 C). Cover, and wait 30 seconds before placing back on heat.
  5. Put the pan back on the heat and let it pop. Shake the pan a gently once the popping starts - be sure to use a kitchen towel or oven mitts to keep the lid from flying off.
  6. When the popping slows, carefully remove the lid (away from your face, please) and dump the popcorn in a large bowl.
  7. Repeat the cooking process with the remaining 3 TBSP oil and 1/3 C corn kernels.
  8. Once all popcorn has been cooked, melt the butter in the saucepan. If the residual heat doesn't melt it, just turn the stove on for a few seconds.
  9. Drizzle the butter over the popcorn, tossing after half has been added.
  10. Add the cheese mixture and toss until distributed. Some of the popcorn may have a more generous coating than the rest depending on how evenly the butter was distributed. Don't stress, it will be plenty cheesy.
  11. Serve immediately or store up to 3 days in an airtight container.

Notes

Stove top popcorn method from Simply Recipes

http://whiskandheels.com/kitchen/cheesiest-cheddar-popcorn

Happy eating!

triple chocolate chunk cookies (and a birthday!)

Well, I hope everyone ate as much as I did over the last two days.  I swear, the only pants that are comfortable right now are my yoga pants.  I have zero intent to wear jeans in the near future.  Today’s post is extra special for two reasons: 1) it’s a birthday celebration for Passing Daisies; and, 2) it will help you extend the holiday season.

RE: 1.  Happy Birthday, Rachael!  Rachael sent me the sweetest email asking if I would participate in her 3-year birthday party for her blog, Passing Daisies.  She’s got a bunch of us bloggers making a birthday feast – and we don’t even have to share our goodies with anyone else because it’s all online!!  More cookies for me!!

Joking aside, head over to Rachael’s blog to check out her birthday post and all of the great recipes and DIY ideas the blogosphere has contributed to her party :)

And now for the cookies.  Triple chocolate chunk cookies, that is!

Triple Chocolate Chunk Cookies

Triple Chocolate Chunk Cookies

This is a fairly easy deviation from a standard chocolate chip cookie recipe – I just took the required chips and divided by 3 so I could use milk chocolate chunks, dark chocolate chunks, and Andes mint chocolate chunks.  I like to buy Ghiradelli 4oz chocolate bars and break them into chunks, but you could also cut them for a more uniform appearance.  You can also experiment with any specialty chocolate bars you like!  Get creative and come up with unique flavor combinations.  Let me know what works for you in the comments below!

Triple Chocolate Chunk Cookies

Triple Chocolate Chunk Cookies

I also deviated from the traditional drop-dough to an icebox technique.  I think it’s a lot easier to get uniform cookies when you roll the dough into logs and slice your cookies off as-needed.  Most importantly, the icebox technique allows for easy freezer-to-mouth conversion (i.e. baking).  You should always have cookie dough in your freezer in case of emergencies (like, you know, bad days and general hunger).

Triple Chocolate Chunk Cookies

Triple Chocolate Chunk Cookies

I’m off to the freezer to slice a few slabs of dough for myself… happy baking!

triple chocolate chunk cookies

prep time: 24 hours, 30 minutes

cook time: 30 minutes

yield: appx 40 cookies

ingredients

  • 3 1/2 C All purpose flour
  • 1 1/4 tsp baking soda
  • 1 1/2 tsp baking powder
  • 3/4 tsp table salt
  • 1 1/4 C unsalted butter, at room temperature
  • 1 1/4 C light brown sugar
  • 1 C granulated sugar
  • 2 eggs, at room temperature
  • 2 tsp vanilla extract
  • 6.5 oz dark chocolate, cut or broken into chunks
  • 6.5 oz milk chocolate, cut or broken into chunks
  • 6.5 ox Andes mint chocolates, cut or broken into chunks

instructions

  1. Mise en place, and read this recipe all the way through.
  2. Sift together the flour, baking soda, baking powder, and salt, and set aside.
  3. In a large bowl or the bowl of a stand mixer fitted with a paddle attachment, cream the butter and sugars together until light and fluffy, 3-4 minutes.
  4. Add the eggs one at a time, beating until fully combined after each addition.
  5. Add the vanilla and again, beat to combine.
  6. With the mixer on low, add the flour mixture to the creamed mixture in 3 additions. Mix until just combined after each addition.
  7. Once all of the flour has been incorporated, fold in all 3 types of chocolate.
  8. Separate the dough into 3 even portions.
  9. Lay each portion out on a piece of parchment paper and roll into 3 tubes of dough, each about 2.5 inches wide. Curl the edges of the parchment into the dough to seal, then transfer to a zip-top bag.
  10. Refrigerate the dough overnight for best results. Dough can be wrapped in foil (over parchment) and frozen for up to 1 month.
  11. When ready to bake, remove the parchment and slice dough into 1/4 inch rounds. Place on a baking sheet lined with parchment or silpats.
  12. Bake at 350 for 10 minutes. Let cool on baking sheet for 5 minutes, then transfer to a cooling rack to cool completely.
  13. Store in an airtight container at room temperature for up to 5 days.

Notes

Adapted from New York Times

http://whiskandheels.com/kitchen/triple-chocolate-chunk-cookies

gameday snacks: chicken tenders [week 16]

Chicken tenders: my go-to diner order at any hour of the day… or night…  I’ve made many a variation of fried chicken, yet this childhood staple is my absolute favorite.  That said, I have zero interest in getting my chicken tenders from a drive-thru window – and lately, I’d rather cook at home than eat out.  So it was definitely time to get my act together and create an all-grown-up chicken tender recipe that everyone can enjoy.

Chicken Tenders

Chicken Tenders

I prefer thin strips of chicken with a thin layer of breading.  If you find this too dainty for your taste, cut your chicken breasts into 1 inch strips instead of half-inch strips, and give ‘em a double dunk in breading.  You’ll need an extra half cup or so of buttermilk to allow for a 3-step breading process: you’ll do the initial flour dredge, then go back to the buttermilk, and finish with a final toss in seasoned flour.  You’ll also need to increase your cooking time to 4-6 minutes per side.  So long as your tenders temp at 160 (assuming you are using chicken breast) before consumption, you’ll be good to go.

Chicken Tenders

Chicken Tenders

I like to serve these like fish and chips… but newspaper ink tends to rub off the paper, so I use parchment instead.  If you want a more classic look, just line the inside of your newspaper cone with some parchment.  I actually set my cones in a tumbler glass and fold the excess paper over the sides because I think the glass is a little easier to hold than the paper cone.  As you can tell from the photos, I also like to include some sliced carrots and celery with my chicken tenders.  It makes me feel less guilty about how much I enjoy making and eating fried foods.  No guilt for you?  Skip the veggies ;)

Chicken Tenders

Chicken Tenders

Even though the recipe calls for spicy ingredients like sriracha and cayenne pepper, the tenders are mild enough for a kid to tolerate.  If you want a little more kick, try doubling the Sriracha and cayenne in the marinade and the breading.

chicken tenders

prep time: 12 hours

cook time: 20 minutes

yield: serves 4

ingredients

    Chicken & Marinade
  • 2 lbs boneless, skinless chicken breast
  • 2 C buttermilk
  • 2 TBSP yellow mustard
  • 3 TBSP Sriracha
  • 2 TBSP honey
  • 2 tsp kosher salt
  • 2 tsp freshly ground black pepper
  • 1 tsp onion powder
  • 1 tsp garlic powder
  • 1 tsp paprika (smoked)
  • Breading
  • 2 C all-purpose flour
  • 2 tsp kosher salt
  • 1 tsp onion powder
  • 1 tsp garlic powder
  • 1 tsp paprika
  • 1/2 tsp cayenne pepper
  • Enough vegetable oil (I use canola) to create a 1/4 inch layer in your skillet

instructions

  1. Mise en place, and read this recipe all the way through.
  2. Cut your chicken breast into strips about 1/2 inch thick. My chicken breasts were about 5 oz each, and I cut each one into approximately 5 strips. Make sure they are all the same size so they will cook evenly.
  3. Combine buttermilk, mustard, Sriracha, honey, 2 tsp salt, 2 tsp pepper, 1 tsp onion powder, 1 tsp garlic powder, and 1 tsp paprika in a 1 gallon freezer bag set in a glass bowl or storage container (in case of leaks!).
  4. Add the chicken and squish everything around to make sure that the chicken is fully coated.
  5. Marinate 4-12 hours in the refrigerator (I made mine the night before, right before I went to bed)
  6. Remove the chicken from the refrigerator and drain in a sieve set over a bowl.
  7. In a separate bowl, whisk together the flour and all subsequent seasonings.
  8. Dredge the chicken in the flour (you'll probably need to do this in batches; tongs will be helpful). Place the dredged chicken on a wire rack set over a baking sheet.
  9. Add 1/4 inch of vegetable oil to a large skillet and set over medium heat until the oil begins to shimmer.
  10. Working in batches, carefully add the chicken to the skillet and cook until golden brown on both sides. Each strip should cook 3-4 minutes per side.
  11. Transfer each fully cooked batch to a (clean!) wire rack set over a rimmed baking sheet lined with paper towels or newspaper. Transfer to a low oven (150-200 degrees) to keep warm while you cook the remaining batches.

Notes

Serve with your favorite dipping sauce and perhaps a few vegetables.

Leftovers? Trying to prep for next weekend? Fry up your chicken tenders and allow them to cool completely. Transfer to a rimmed baking sheet (single layer, please) and freeze until solid, about 2 hours. Transfer again to a freezer bag and store up to 1 month. To reheat, bake at 375 on a wire rack set over a rimmed baking sheet for 10-15 minutes.

http://whiskandheels.com/kitchen/chicken-tenders

Happy eating!  Let me know how this recipe worked out for you in the comments below!